

So you've poured your heart and soul into creating an amazing video. Now what? Getting it onto YouTube and in front of an audience is the final, crucial step. It's not as simple as just hitting a button; it's a three-phase process that, when done right, gives your video the best possible chance to succeed.
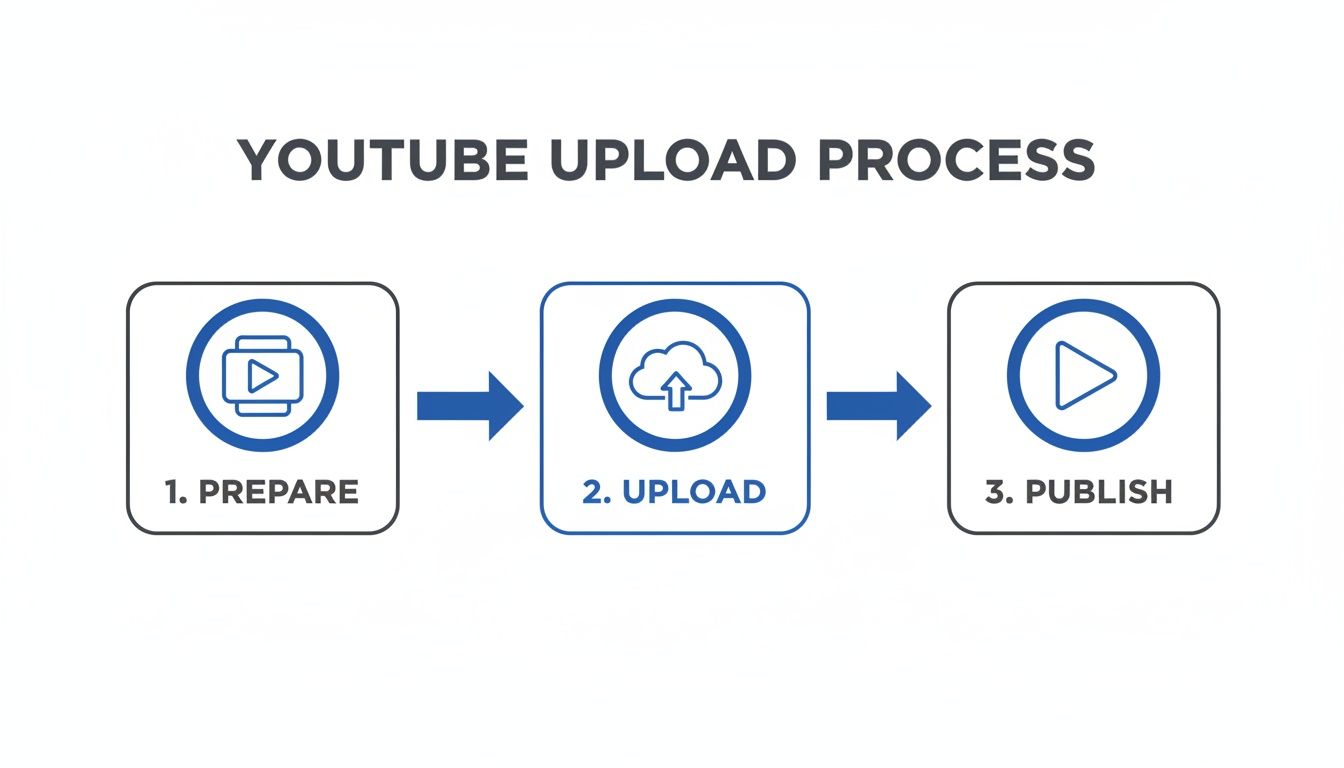
Think of it in three simple stages: prepare your video file, upload it to YouTube Studio, and finally, publish it for everyone to see. A little planning here, from picking the right file format to designing a killer thumbnail, can make all the difference between a video that sinks and one that soars.
Your Roadmap to a Successful YouTube Upload
This guide is your roadmap. We'll walk through every single decision, from the moment you export your final cut until you confidently hit that "Publish" button. The journey starts long before you even open YouTube. It kicks off with finalizing your edit and making sure your video is in a friendly format like MP4.
Once your file is good to go, you'll upload it into YouTube's system. From there, it's all about optimization—setting up your metadata and choosing the right visibility settings to go live.
This simple flow captures the entire process: get your file ready, get it onto the platform, and get it out to your viewers.
Each of these big stages involves smaller, but equally important, steps—like writing a magnetic title or scheduling your launch. We'll break all of it down in this guide.
Why Your First Upload Matters
Your first video sets the tone for your entire channel. It can feel intimidating to jump into a space with so many established creators, but the numbers tell a really encouraging story.
As of Q2 2025, a staggering 1.1 million videos are uploaded every single day. And here’s the best part: channels with fewer than 10,000 subscribers are responsible for a whopping 61% of them. This shows that small creators are the real engine of YouTube. There has never been a better time to start. Dive into more YouTube upload statistics to see the full picture.
Here's a quick checklist to keep in your back pocket as we go through the process. It's a high-level look at the key actions you'll take, ensuring you don't miss a beat.
YouTube Publishing Checklist: Your Quick-Start Guide
| Phase | Key Action | Why It Matters |
|---|---|---|
| Preparation | Finalize your video file in a compatible format (like MP4). | A clean, properly formatted file prevents upload errors and ensures high-quality playback for your viewers. |
| Upload | Navigate to YouTube Studio and select your video file. | This is the technical step of getting your content onto YouTube's servers, where it will be processed. |
| Optimization | Craft a compelling title, description, and thumbnail. | This is your video's "first impression." Good metadata helps YouTube understand your content and recommend it to the right audience. |
| Publishing | Choose your visibility settings (Public, Private, Unlisted). | This final step determines who can see your video and when, giving you full control over your launch strategy. |
Think of this checklist as your flight plan. By following these steps, you're setting yourself up for a smooth and successful launch.
The key takeaway is that you don't need a huge audience to begin. The platform is built on fresh content from new voices, and a well-executed publishing strategy is your ticket to being discovered. By focusing on quality and consistency from your very first upload, you create a powerful launchpad for your channel's future.
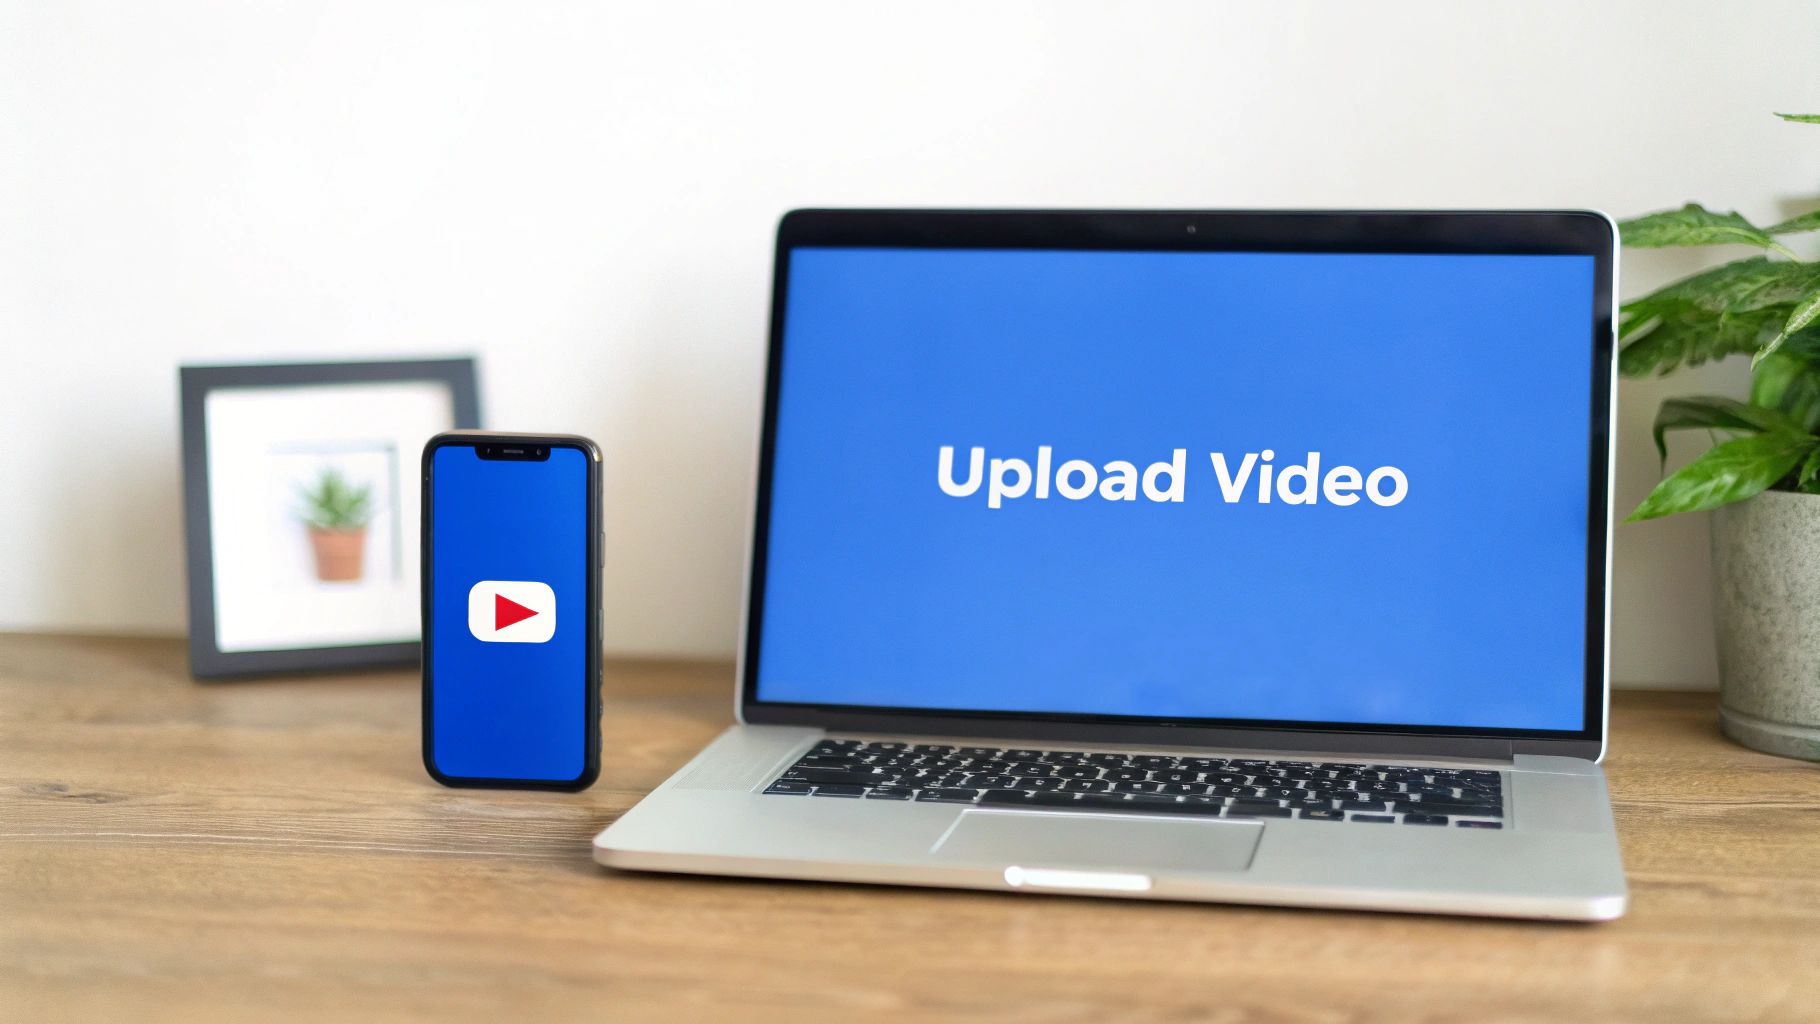
Uploading Your Video on Desktop and Mobile
Alright, your video is edited and ready. Now comes the moment of truth: getting it onto YouTube. This is where your creation officially starts its journey. Whether you're at your desk and prefer the full suite of controls or you're out and about with just your phone, the upload process is surprisingly simple. Let's break down both ways so you can get your video live, no matter your setup.
The two main paths you can take offer pretty different experiences. The desktop workflow is your all-in-one command center, giving you every possible setting right from the start. On the other hand, the mobile app is all about speed and convenience.
Before you start, one quick but crucial tip: make sure your internet connection is up to the task. Nothing kills the creative buzz like a painfully slow upload. For a better idea of what you need for big files, it's worth understanding what makes a good upload speed.
The Desktop Method via YouTube Studio
For creators who like to fine-tune every detail in one go, uploading from a computer is the way to go. Your home base for this is YouTube Studio, the backend where you manage everything about your channel.
Getting your video uploaded is a quick three-step process:
- Head to YouTube Studio. Just log into your YouTube account, click your profile icon in the top-right corner, and choose “YouTube Studio” from the dropdown menu.
- Kick off the upload. Look for the “Create” button—it’s the one with a camera icon and a plus sign. Click it, then select “Upload videos.”
- Choose your file. A new window will pop up. You can either drag and drop your video file right into it or click “Select Files” to find it on your computer. The upload will start instantly in the background, letting you fill out all the important details while you wait.
This method is perfect for your main, long-form videos. It lets you meticulously craft your title, description, tags, and thumbnail all in one sitting, giving you a complete overview of all the optimization options before hitting publish.
Publishing on the Go with Mobile
With short-form content absolutely dominating, it's no surprise that mobile uploading has exploded in popularity. It's built for creators who shoot, edit, and publish all from their phones.
The numbers don't lie. A staggering 72% of daily uploads to YouTube now come from mobile devices. It’s the go-to workflow for getting content out fast.
The process couldn't be simpler:
- Open up the YouTube app and tap the “+” icon you see at the bottom of the screen.
- Select “Upload a video” and pick the clip you want from your phone's gallery.
- Toss in a title and description, then just hit “Next.”
This is, without a doubt, the fastest way to get a video published on YouTube, especially for vertical Shorts. If you want a deeper dive, we have a whole guide on how to upload YouTube Shorts.
Pro Tip: Even when you upload from your phone for speed, I always recommend circling back later on a desktop. Hop into YouTube Studio to add those extra layers of polish like chapters, end screens, and info cards—features that you can't access in that initial mobile upload flow. It’s a small step that makes a big difference.
Optimizing Your Video for Maximum Discovery
Getting your video uploaded is a great start, but it’s just that—a start. If you want people to actually find and watch your video, you need to tell YouTube what it's about. This is the optimization phase, where you turn a simple video file into an asset the algorithm can understand and recommend.
Think of it like this: your video is the product, and the title, description, and thumbnail are the packaging. No matter how brilliant the product is, if the packaging is bland or misleading, no one's going to pick it off the shelf. Let’s walk through how to get each piece right.
Crafting the Perfect Title and Description
Your video title is your single most important piece of SEO real estate. It needs to contain your main keyword while being intriguing enough to make someone stop scrolling and click. A title like "My Travel Video" is a dead end; it tells both viewers and the algorithm absolutely nothing.
A much stronger title would be something like, "24 Hours in Tokyo: A First-Timer's Itinerary." This works because it includes a clear keyword ("Tokyo Itinerary"), sets expectations perfectly, and speaks to a very specific audience.
Next up is your description. The first 2-3 sentences are pure gold because they often show up directly under your video in search results. Use this space to expand on your title, add more keywords, and give a quick, compelling summary of what the video delivers.
- Front-load your keywords. Put the most important phrases right at the beginning of your title and description. This is a classic SEO tactic that still works wonders.
- Add helpful context. Use the rest of the description to add value with timestamps (we’ll get to chapters), links to resources you mentioned, and your social media handles.
- Write like a human. Don't just stuff it with keywords. A robotic, keyword-heavy description is a huge red flag for viewers and can hurt you more than it helps.
Designing a Click-Worthy Thumbnail
Let’s be honest: your thumbnail is probably the single biggest factor in getting views. On a crowded YouTube homepage, a powerful thumbnail is what stops the scroll. I’ve seen it time and time again—videos with custom, high-contrast thumbnails crush those with lazy, auto-generated ones.
A great thumbnail should be:
- Clear and simple: Don't clutter it up. Focus on a single, powerful image, often a high-quality photo of a face showing a strong emotion.
- Bright and bold: Use colors that pop against YouTube’s white, gray, or dark mode interface. High contrast is your best friend.
- Text-supported: A few words of bold, easy-to-read text can add intrigue and complement your title. Think of it as a mini-headline.
The thumbnail and title are a one-two punch designed to grab attention. Getting this combo right is an art and a science, so if you really want to level up, check out our complete guide to YouTube thumbnails.
Your video's thumbnail is its billboard. It doesn't matter how great your content is if the billboard advertising it is boring, confusing, or invisible. Invest time here; it pays the highest dividends in clicks.
Using Tags and Chapters Strategically
Tags used to be a massive deal, but their importance has faded over the years. That said, they aren't completely useless. They still help YouTube categorize your video and can be a safety net for common misspellings of your main keyword.
I usually recommend focusing on just a few key tags:
- Your primary keyword (e.g., "how to publish a video on youtube").
- A few variations of that keyword (e.g., "youtube upload tutorial," "publishing on youtube").
- A couple of broader category tags (e.g., "video marketing," "content creation").
Video chapters, on the other hand, have become incredibly important. By simply adding timestamps in your description (like 0:00 - Intro), you slice your video into easy-to-navigate sections. This does more than just improve the viewer experience—it also helps your video show up in Google search results with "key moments" highlighted, creating more pathways for people to discover your content.
To help you keep all these elements straight, here’s a quick-reference table that breaks down the purpose and best practices for each optimization piece.
Video Optimization Elements At a Glance
| Element | Primary Goal | Pro Tip Example |
|---|---|---|
| Title | Capture attention and rank in search results. | "How to Bake Sourdough Bread (Beginner's Guide)" instead of "My Baking Video." |
| Description | Provide context for YouTube's algorithm and viewers. | Use the first 2 lines for a keyword-rich summary; add timestamps and links below. |
| Thumbnail | Stop the scroll and earn the click. | A high-contrast image with bold, minimal text like "EASY SOURDOUGH." |
| Tags | Help YouTube categorize content and catch misspellings. | Include specific tags like "sourdough for beginners" and broad ones like "baking." |
| Chapters | Improve viewer experience and boost Google search visibility. | 0:00 - Intro, 1:15 - Mixing the Dough, 5:30 - Shaping the Loaf. |
Think of these elements as a checklist. Running through each one before you hit "Publish" will dramatically increase the odds of your video finding the right audience.
Navigating Advanced Publishing Settings
Once your video’s details are locked in, you’ll hit the "Visibility" screen. This is where you graduate from just uploading content to strategically managing it. These settings give you pinpoint control over who sees your video and when, turning a simple upload into a calculated launch.
Getting a handle on these options is what separates the pros from the amateurs. It’s not about just slamming the "Publish" button; it's about choosing the right tool for the job.
Choosing Your Visibility Level
YouTube gives you three core visibility options, and each one serves a very different purpose. Nailing this choice ensures your content hits the right eyeballs at the right time.
- Private: Think of this as your digital vault. Only you and the specific people you invite via email can see the video. It’s perfect for storing drafts, sharing a cut with a client for approval, or just keeping personal family videos locked down.
- Unlisted: This is your secret handshake. Anyone with the direct URL can watch, but the video won’t show up in search results, on your channel, or in your subscribers' feeds. It's the go-to for sharing a video with a small group for feedback or embedding it on a website without cluttering your public channel.
- Public: This is the main event. Setting a video to "Public" makes it live for the entire world. It gets indexed by search, shows up on your channel, and pings your subscribers. Game on.
Choosing the right visibility is a strategic move. I always use Unlisted to get pre-launch feedback from a trusted circle and Private for internal reviews or client sign-offs. This one step can save you from publishing a video with a glaring mistake.
Scheduling and Premiering Your Content
Dropping your video the moment your audience is most active can give its initial performance a serious jolt. Instead of playing guessing games with time zones, you can use the Schedule feature. This lets you pick a future date and time for your video to go public automatically.
For creators who love to build some hype, Set as Premiere takes things a step further. A Premiere creates a public watch page before the video is live, letting you build anticipation. When it's go-time, YouTube runs a slick two-minute countdown, and you and your viewers get to watch the video together for the first time, all while chatting live. It’s an incredible tool for community building. Our guide on the YouTube video scheduler digs into these features in more detail.
Monetization and Other Key Settings
If you’re in the YouTube Partner Program, the "Monetization" tab is where you control the cash flow. Here, you can toggle monetization on or off and pick the ad formats you want to run, like skippable video ads or quick non-skippable bumper ads.
Beyond the money, a few other settings add critical layers of professionalism and reach. Adding subtitles or closed captions makes your content accessible to a much bigger audience, including viewers with hearing impairments or those who speak other languages.
And don’t forget playlists. Organizing your video into a relevant playlist is one of the easiest and most effective ways to boost session watch time by queuing up another one of your videos for viewers.
In a space where YouTube is on track to host over 5.1 billion videos by 2025, you need every advantage you can get. The most successful creators I know use playlists and pre-publish community posts to squeeze every drop of engagement out of a new video from the second it goes live. You can find more insights on current YouTube video statistics to help shape your strategy.
Troubleshooting Common Upload Issues
It happens to the best of us. You’ve poured hours into editing the perfect video, you hit "Upload," and… nothing. The progress bar just sits there, mocking you. Your video upload can get stuck, flagged, or fail for reasons that aren't always clear right away.
Let's walk through how to fix the most common roadblocks so you can get your content live.
When an upload freezes, especially at that dreaded 95% or 99% mark, it's almost always a processing issue on YouTube's end, not a problem with your file. Their servers are dealing with an unbelievable amount of data—a staggering 720,000 hours of new video every single day. Glitches are inevitable.
Knowing the basics helps. Stick to the recommended MP4 format and try to keep files under 128GB. Also, remember that uploading during peak internet hours can really slow things down.
Sometimes, the simplest solutions work best. Before you start pulling your hair out, let's try a few quick checks.
First Steps for a Frozen Upload
If your video is stuck, your first instinct might be to cancel and start over. Don't. That should be your absolute last resort. Instead, work through these common culprits first:
- Check Your Connection: Is your internet stable? Even a tiny drop in your Wi-Fi can interrupt the upload process and cause it to stall.
- Try a Different Browser: This sounds too simple, but browser extensions or a bogged-down cache can interfere with the upload. Switching from Chrome to Firefox (or vice versa) often does the trick.
- Just Be Patient: I know it's hard, but during high-traffic periods, processing just takes longer. Give it an hour or two. Go grab a coffee and come back to it.
If those quick fixes don't get things moving, the issue might be a little deeper, like a problem with the video file itself or a more stubborn server-side error. If you're still running into snags, this guide can help you fix common YouTube upload issues.
Pro-tip from experience: One of the most reliable fixes I've found for a perpetually stuck video is to simply re-export it from my editing software. Even if I use the exact same settings, creating a completely fresh file often clears up hidden corruption issues that cause YouTube's processor to choke.
Another headache you might run into is an unexpected copyright claim. This happens when YouTube’s Content ID system automatically flags audio or visuals that match something in its massive database.
Don't panic! This is not a strike against your channel. It usually just means that ads might run on your video, with the revenue going to the original copyright holder. If you have the proper license or think the system made a mistake, you have every right to dispute the claim directly within YouTube Studio.
Your YouTube Publishing Questions Answered
Even with a step-by-step guide, you’re bound to have questions. It’s just part of the process when you're figuring out how to publish a video on YouTube for the first time.
This last section is all about tackling the common hang-ups we see creators wrestling with. Think of it as a quick reference guide for those nagging "what if" moments, pulled straight from community discussions and our own experience.
How Long Should My YouTube Video Be?
This is the million-dollar question, isn't it? And the answer is refreshingly simple: as long as it needs to be to deliver on its promise, and not a second longer.
Your goal should always be to hold your viewer's attention. Audience retention is a massive signal to the YouTube algorithm, which means a tight, engaging video is always better than a long, rambling one. With over 500 hours of video hitting the platform every minute, you're fighting for every second of watch time.
The data shows the average long-form video length is around 11.7 minutes, which feels right for a solid tutorial or a deep-dive review. But don't ever pad your content just to hit a number. For more insights on this, you can check out some of the latest YouTube trends on electroiq.com.
The best video length is one that respects your audience's time. If you can teach something in five minutes, make a five-minute video. If a full review takes fifteen, use fifteen. Value, not the clock, should always be your guide.
Do YouTube Tags Still Matter?
Yes, but their role has changed dramatically. A few years back, stuffing the tag section with every keyword under the sun was a core part of YouTube SEO. Today, your title, description, and thumbnail do most of the heavy lifting in helping YouTube understand and rank your video.
So, where do tags fit in now? Think of them as a helpful supplement, not the main event. Here’s how I use them:
- Catching Common Misspellings: I’ll add a few common typos of my main topic or brand name that I know people search for.
- Adding Synonyms: Include a couple of alternative terms for your main keyword. For a video on "how to publish," you might add "uploading guide."
- Reinforcing the Core Topic: I stick to about 5-8 highly relevant tags that hammer home what the video is truly about.
Don't waste hours agonizing over tags. A handful of well-chosen ones are all you need to give the algorithm a little extra context.
When Is the Best Time to Publish a Video?
The best time to publish is when your audience is actually online and ready to watch. For years, creators followed generic advice like "post on Tuesday afternoons," but there’s a much smarter way to do it: use your own channel's data.
Once you have a bit of traffic, head into YouTube Studio and open the Analytics tab. From there, click on the "Audience" tab, and you'll see a chart called "When your viewers are on YouTube." This graph is gold. It shows you, hour by hour, when your specific audience is most active on the platform.
By scheduling your video to go live just before or right as that peak window starts, you give it the best possible shot at getting that crucial initial traction from your subscribers. That early velocity can make a huge difference in how far and wide the algorithm pushes your video to new people.
Feeling the content creation grind? ShortsNinja is an AI platform built to automate your entire short-form video workflow. You can go from a simple idea to a fully generated, edited, and scheduled video for YouTube Shorts and TikTok in just a few minutes. Let our AI handle the production so you can get back to growing your channel. Start creating with ShortsNinja today.