
Feeling completely lost in the world of video editing? Let’s be honest, modern video editing software for beginners has less to do with being a tech wizard and more to do with telling a great story. Your first and most important step is simply finding a tool that feels right—one that balances powerful features with an interface that doesn’t make you want to throw your computer out the window.
Your Starting Point in Video Creation
Jumping into video creation can feel like trying to learn a new language overnight. The good news? The right software acts as your personal translator, turning your creative sparks into polished content ready for YouTube, TikTok, or your next big presentation. The real goal is to find a tool that can grow with you. It should be simple enough for your first project but have enough under the hood for your hundredth.
This guide is here to cut through the noise. We'll walk through the essential concepts you actually need to know, from arranging clips on a timeline to adding slick transitions and even using AI to get things done faster. Forget the intimidating jargon. Making great videos is more accessible than ever before.
Why Choosing the Right Software Matters
There's no denying it—the demand for video content is through the roof, creating a massive opportunity for anyone willing to press record. The global video editing software market ballooned to $3.09 billion in 2023 and is expected to hit $5.13 billion by 2032. That explosion is happening for a reason: platforms like TikTok and YouTube run on engaging, well-edited videos. For creators and small businesses, a tool that shrinks editing time from hours down to minutes isn't just nice to have; it's a game-changer.
If you want to see this in action, learning skills like creating effective product videos is a perfect real-world example of how the right software can directly boost a brand's presence.
The biggest hurdle for beginners isn't creativity; it's finding a workflow that doesn't kill your momentum. The best software removes technical friction, letting you focus entirely on your message and story.
What You Will Learn in This Guide
We've designed this guide to build your confidence step-by-step. Our goal is to take you from total novice to capable creator by focusing on the key areas every beginner needs to get a handle on.
- Core Editing Concepts: We’ll break down the basics—the timeline, trimming clips, adding text—using simple analogies that actually make sense.
- Software Selection: You'll learn how to weigh your options, from free desktop apps to powerful AI platforms, so you can find the perfect match for your goals and budget.
- AI-Powered Workflows: Discover how artificial intelligence is making video creation insanely fast and accessible, especially for things like faceless social media content.
- Common Beginner Mistakes: We'll point out the classic rookie errors in audio, pacing, and visual quality so you can sidestep them and make your first videos look sharp.
Understanding the Core Tools of Video Editing
Firing up video editing software for the first time can feel like you've stepped into a spaceship cockpit—buttons, dials, and weird-looking panels everywhere. But don't let it intimidate you. You only need to get a handle on a handful of key tools to start putting together a compelling story.
Think of it less like learning rocket science and more like figuring out a new kitchen. Once you know where the knife, cutting board, and stove are, you can start cooking.
The Timeline: Your Digital Storyboard
At the heart of pretty much every video editor is the Timeline. This is your digital canvas, a horizontal track where you’ll arrange your video clips, audio files, and images in the exact order you want them to appear.
Each thing you add sits on its own layer, almost like clear sheets stacked on top of each other. This is what lets you put text over a video clip or mix background music under someone's dialogue.
Your first step is always importing your raw footage into the Media Bin (sometimes called the Library). This is basically your pantry. It holds all your ingredients—video clips, sound effects, music, images—before you start placing them on the Timeline to build your final video.
Mastering the Art of the Cut
Once your clips are on the Timeline, your main job is to shape the story. This is where trimming and splitting come in. Think of trimming a clip like cropping a photo; you’re not deleting the original file, just adjusting the start and end points to show only the best part. It's perfect for cutting out awkward pauses or shaky camera movements.
Splitting, on the other hand, is like taking scissors to a piece of paper. You're literally cutting a longer clip into smaller, more manageable pieces. You might do this to stick another clip in the middle, snip out a mistake from the center of a take, or apply an effect to just one part of the video.
Key Takeaway: Trimming and splitting clips is the single most fundamental skill in video editing. Getting this down gives you complete control over your video's pacing and flow, turning a jumble of raw footage into a story that makes sense.
Adding Polish with Transitions and Effects
With your clips all lined up, the next step is connecting them smoothly. Transitions are the glue that holds your scenes together. While a simple "cut" from one clip to the next is what you'll use 95% of the time, others can add a bit of stylistic flair.
- Fade: This is where a scene slowly appears from (or disappears to) a black screen. It’s often used to signal the beginning or end of a video or a major shift in time.
- Dissolve: One scene gently blends into the next. This creates a softer, less jarring transition than an abrupt cut and can suggest a connection between the two scenes.
- Wipe: One shot literally pushes another one off the screen. Wipes can look a little dated if overused, but they can be a fun way to add a specific visual style when used deliberately.
Beyond just connecting clips, you can add text overlays to introduce a speaker, pop up important info, or create cool-looking title cards. Basic color correction is another surprisingly powerful tool. Just a few tweaks to brightness, contrast, and saturation can make your footage look way more vibrant and professional.
Finally, don't forget that audio is just as important as the visuals. Most video editing software for beginners has tools to adjust volume levels, add background music, and drop in sound effects. Adding a narrator's voice is also a great way to guide the viewer. For a deeper dive, our guide on how to add voiceover to video walks you through the whole process.
Once you understand these core tools—the Timeline, trimming, transitions, and audio mixing—you're more than ready to start your editing journey.
How To Choose Your First Video Editing Tool
Okay, you’ve got the core concepts down. Now for the big decision: which tool are you actually going to use? Finding the right video editing software for beginners isn't about grabbing the one with the most bells and whistles. It's about finding a platform that fits your goals, your budget, and how comfortable you are with technology.
Think of it like picking your first car. You don’t need a Formula 1 machine just to learn how to drive to the grocery store. In the same way, you don't need a Hollywood-level software suite to cut together an awesome TikTok video.
The options really boil down to three camps: free desktop software, paid professional tools, and the newer AI-powered platforms. Each has its own pros and cons, and knowing what they are will help you make a choice you won't regret later.
Breaking Down Your Software Options
Let's start with the free stuff. Tools like the free version of DaVinci Resolve or Shotcut are incredible if your budget is zero. They give you a taste of powerful, industry-standard features, letting you learn the ropes without spending a dime. The trade-off? A steeper learning curve and fewer hand-holding features.
Then you have the paid professional suites like Adobe Premiere Pro. These are the industry standard for a reason—they offer a massive feature set, rock-solid performance, and play nicely with other creative tools. The catch is the price, which is usually a subscription that can feel like a big commitment when you're just starting out.
Finally, there's a new wave of AI-powered platforms like ShortsNinja. These tools are built for one thing: speed. They automate the tedious parts like writing scripts, finding stock footage, and adding voiceovers. They're an absolute game-changer for creators who need to pump out short-form content for social media, turning hours of work into just a few minutes. If you want to see how these stack up, we've put together a detailed video production software comparison.
No matter which path you take, the basic workflow is pretty similar, as you can see in the flowchart below.
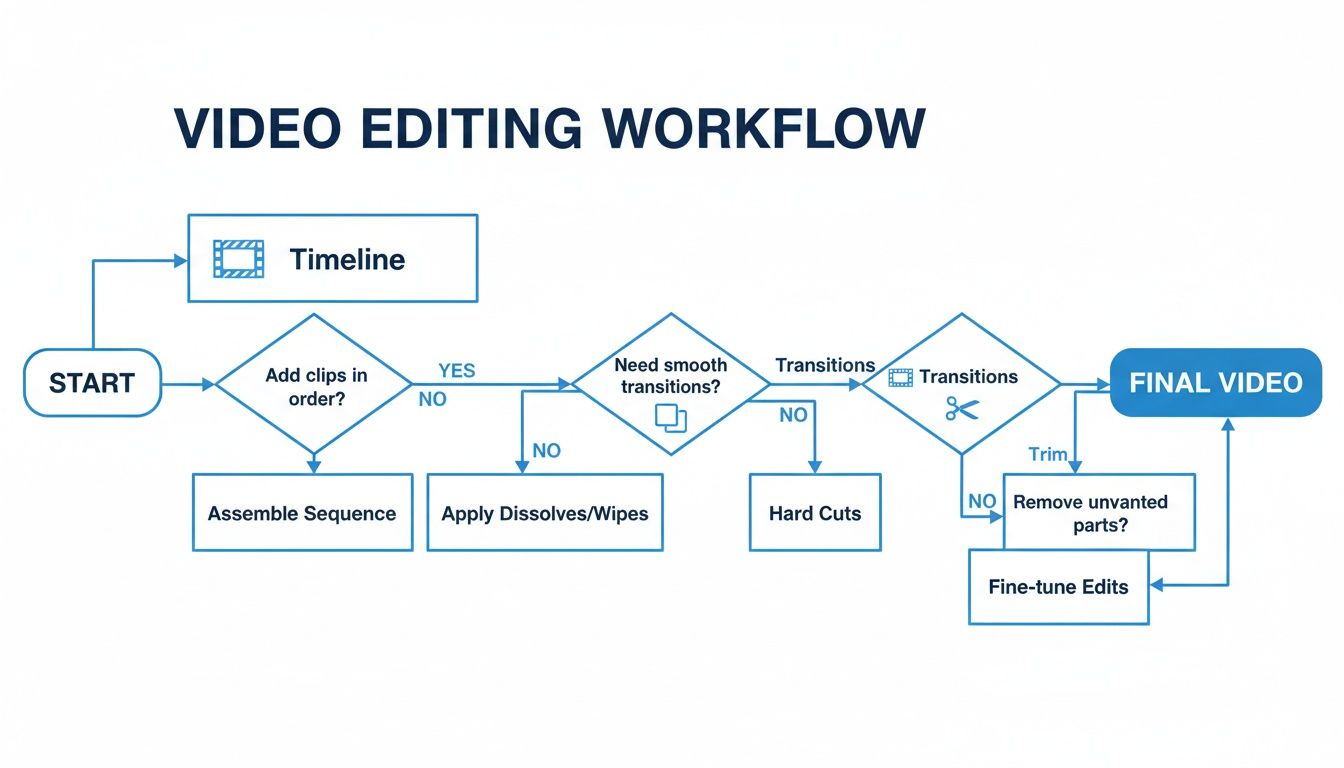
This just shows that things like managing a timeline, adding transitions, and trimming clips are universal. You'll be doing them everywhere.
Comparing Key Features And Trade-Offs
When you lay these options side-by-side, the differences become clear. Free tools give you core functionality but might slap a watermark on your video or limit export quality. Paid software removes all the guardrails but hits your wallet. AI platforms are hyper-focused on specific workflows, like social media content, but you might give up some of the granular, hands-on control a traditional editor offers.
The most important thing is to match the tool's strengths to your main goal. If you want to learn the craft of filmmaking, a traditional editor is your best bet. If you want to build a TikTok presence fast, an AI automation tool is way more efficient.
The demand for accessible tools is driving massive growth in this space. The video editing market is expected to hit $3.75 billion by 2026 and jump to $4.99 billion by 2031. This boom is happening because creators want user-friendly tools that get the job done without the intimidating complexity of older software.
To make things even clearer, here’s a table that breaks down the key differences.
Comparing Beginner Video Editing Software Options
This table provides a simple, feature-by-feature look at the trade-offs between free, paid, and AI-powered video editing platforms, helping you pinpoint the best fit for your projects.
| Feature | Free Software (e.g., DaVinci Resolve Free) | Paid Software (e.g., Adobe Premiere Pro) | AI Platform (e.g., ShortsNinja) |
|---|---|---|---|
| Primary Goal | Learning the fundamentals of editing | Professional, high-control projects | Fast, consistent social media content |
| Cost | Free (with potential limitations) | Monthly/Annual Subscription | Monthly Subscription (often tiered) |
| Learning Curve | High | Medium to High | Very Low |
| Typical Use Case | YouTube vlogs, student projects | Feature films, complex commercial work | TikToks, Reels, YouTube Shorts |
| Key Advantage | No financial investment | Unmatched features and control | Speed and automation |
Ultimately, the best video editing software for beginners is the one you’ll actually open and use. Don’t get stuck trying to find the "perfect" tool. Just pick one that makes sense for your goals and budget right now, make a few videos, and see how it feels. You can always switch later
The Rise of AI in Beginner Video Creation
Let's be honest, the biggest leap forward in video creation isn't some fancy new transition pack or a slicker timeline. It's Artificial Intelligence. And for anyone just starting out, AI isn't just another feature—it's a completely different way of making videos, one that smashes through the biggest roadblocks new creators face.
Think about it. You have a great idea, but then you remember the painful process: writing a script, digging through stock footage sites for hours, and then trying to record a decent voiceover. This is exactly where modern AI video tools flip the script. Instead of staring at a blank project, you just start with your idea. The AI does the heavy lifting for you.
What used to be a multi-hour, multi-step headache is now a simple workflow that takes just a few minutes. It's a massive shift that makes creating content consistently actually possible for everyone, not just the pros.
From Idea to Published Video in Minutes
If traditional video editing is like being a bricklayer, meticulously placing every single clip and sound effect, then AI video creation is like being the architect. You provide the blueprint—your idea—and an automated system handles all the construction.
This new approach is incredibly effective for pumping out short-form content for platforms like TikTok, YouTube Shorts, and Instagram Reels. The whole process is refreshingly simple.
- Input Your Idea: You kick things off by typing a simple prompt. This could be anything from "the history of the Roman Empire" to "five tips for better sleep."
- Refine the AI Script: The AI instantly generates a complete, engaging script. You can then jump in and make quick edits to match your personal style and tone.
- Generate Visuals and Voiceover: With just a click, the platform creates a surprisingly human-like voiceover and automatically finds relevant video clips and images to go along with the script.
- Quick Edit and Schedule: Finally, you make a few last-minute tweaks, maybe add some background music, and schedule the video to post directly to your social media channels.
This automated workflow is the secret weapon behind "faceless content," a hugely popular video style that doesn't require you to ever step in front of the camera.
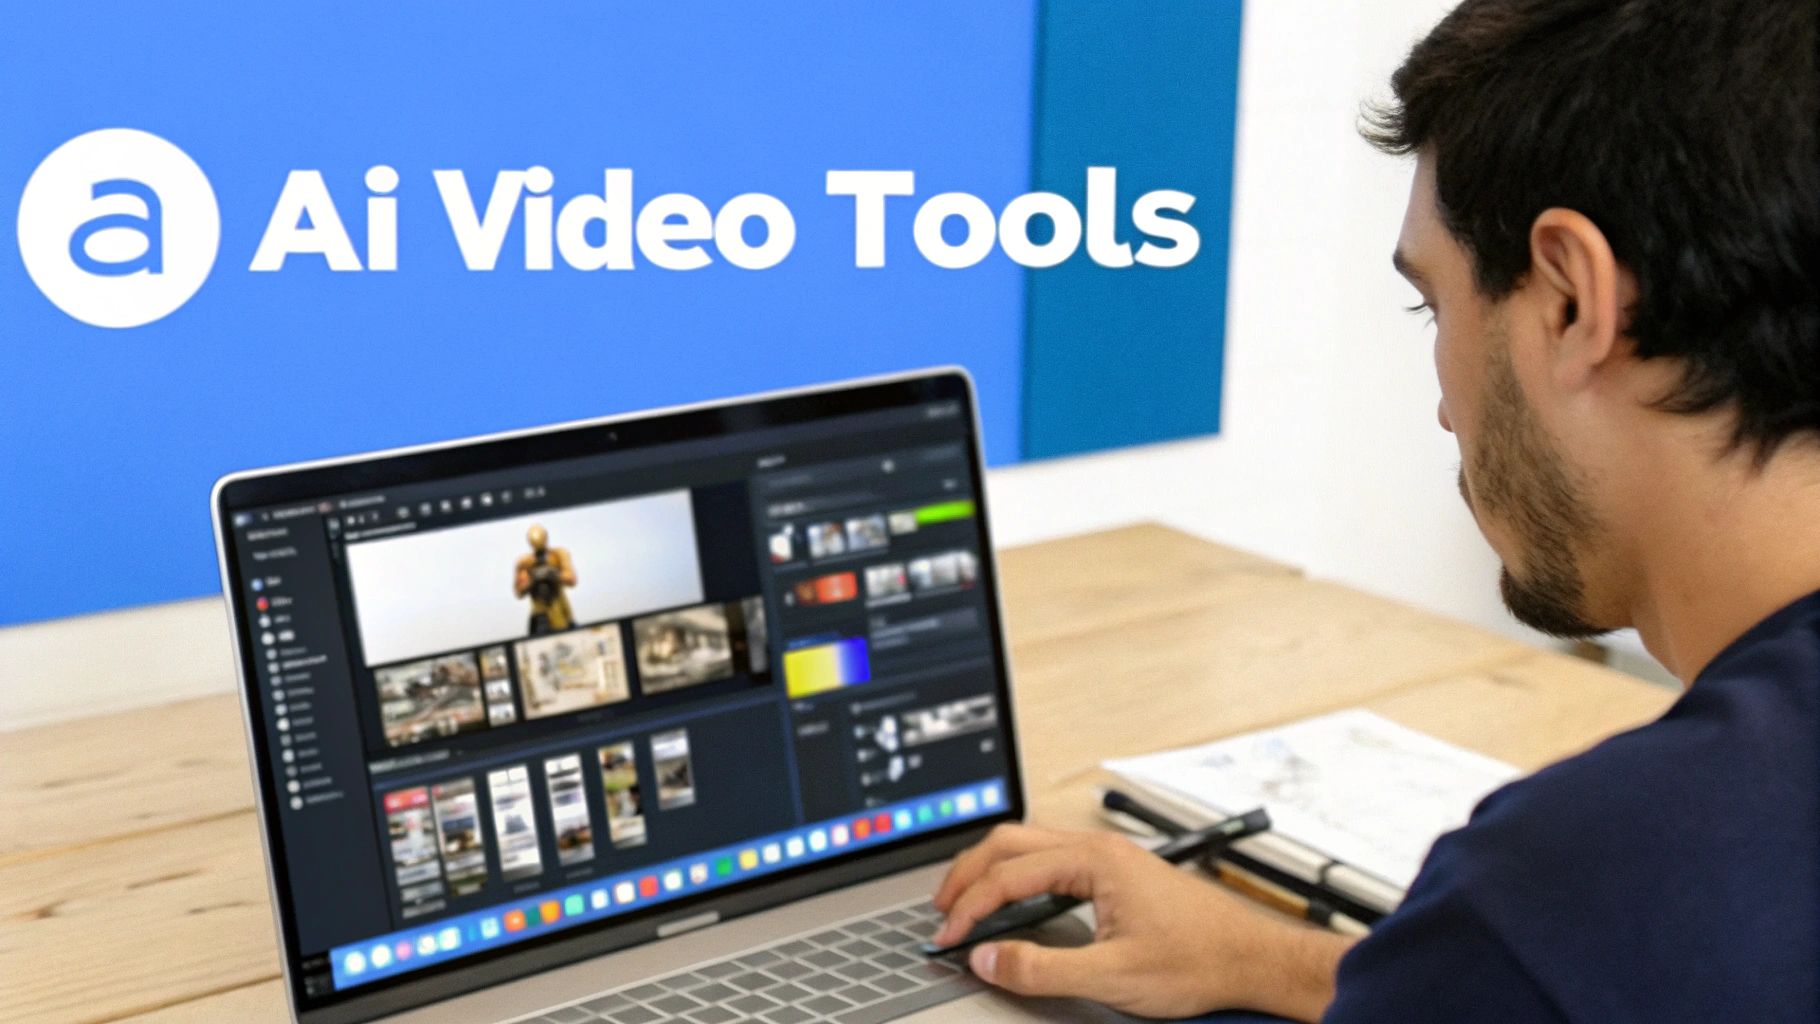
As you can see, modern tools like ShortsNinja offer a clean, step-by-step interface. It walks you from a simple idea to a finished video without ever dumping a bunch of complicated settings on you.
AI Features That Empower Beginners
AI is completely changing the game for new editors by solving the exact problems that cause the most frustration. If you want to get ahead, you can explore some of the best AI video editing software available today. For a deeper dive, our guide on AI video editing tools has you covered.
The real magic of AI for beginners is automation. It gets all the technical junk out of the way so you can focus on the creative side of telling your story and consistently get high-quality videos out the door.
This shift is a big deal, especially in the mobile-first world of social media. The video editing app market is expected to jump from $1,593.25 million in 2026 to $2,150.84 million by 2035, all thanks to the trillions of short videos we watch on TikTok and Reels. For small businesses and influencers, this is huge: video brings in 66% more qualified leads, but a staggering 75% of novices say the editing process is just too intimidating. AI is the bridge over that gap.
Here are a few key AI-driven features to look for:
- AI Voiceover Technology: Get realistic text-to-speech voices in dozens of languages. This completely eliminates the need for pricey microphones or nerve-wracking recording sessions.
- Multi-Language Support: Instantly create different versions of your video for a global audience by translating the script and generating a brand-new voiceover.
- Automated Scheduling: Keep your posting schedule consistent without even thinking about it. Just connect your social accounts and let the platform publish new content for you automatically.
Common Mistakes New Video Editors Make
Jumping into your first project is exciting, but it's really easy to make a few rookie mistakes along the way. Think of this as your friendly guide to sidestepping the most common pitfalls. If you build good habits from day one, you'll see a huge difference in the quality of your videos and feel much more confident as a creator.

The great news is that these slip-ups are pretty simple to fix once you know what to look for. Let's walk through them so your first videos look polished and professional, not like a first attempt.
Overlooking The Importance Of Audio Quality
This is, without a doubt, the number one mistake beginners make. You can have stunning 4K footage, but if your audio is scratchy, muffled, or full of background noise, viewers will click away instantly. Bad audio screams "amateur" faster than anything else.
- What Not to Do: Don't just rely on the built-in microphone on your camera or laptop. They are notorious for picking up every echo, fan hum, and keyboard click, leaving you with a hollow, unprofessional sound.
- What to Do Instead: Invest in an affordable external microphone. A simple USB mic or a lavalier mic that clips onto your shirt can make a world of difference. Also, try to record in a quiet space—away from refrigerators, air conditioners, and street traffic.
Creating Jarring Edits And Pacing Problems
Good editing is all about creating a smooth, engaging flow. Two common issues that completely wreck this flow are awkward jump cuts and pacing that’s just too slow for modern attention spans.
A jump cut is that jarring glitch you see when one clip of a person talking abruptly cuts to another shot of them from a slightly different angle. It feels clunky and can be really distracting. Similarly, letting a scene drag on forever without a change in visuals will bore your audience fast, especially on quick-hitting platforms like TikTok.
Pro Tip: Use B-roll footage—that’s just supplemental clips related to what you're talking about—to cover up your cuts. Talking about coffee? Cut to a shot of someone pouring a cup. This simple trick makes your video way more dynamic and interesting to watch.
Using Hard To Read Text And Graphics
Adding text overlays is a fantastic way to emphasize key points, but only if people can actually read them. New editors often choose fonts that clash with the video's vibe, pick colors that blend into the background, or just make the text way too small.
- Mistake 1 Font Choice: Using a super decorative or cursive font that’s hard to read, especially on a tiny phone screen.
- Mistake 2 Color Contrast: Placing white text over a bright sky or dark text over a shadowy area without an outline or background shape.
- Mistake 3 Text Size: Making the text so small that your viewers have to squint. (Spoiler: they won’t bother.)
The fix is easy: stick with clean, simple fonts. Always make sure there’s high contrast between the text and whatever is behind it—a semi-transparent black box behind white text works wonders. And finally, before you hit publish, preview your video on your phone to make sure everything is legible.
Becoming a Confident Video Creator
You've made it through the nuts and bolts—the core concepts, the different types of software, and the rookie mistakes to sidestep. The final step is always the most exciting: turning all that knowledge into actual videos. Theory is great, but confidence is built by doing.
Remember, the hunt for the "best" video editing software for beginners isn't about finding some magical, one-size-fits-all tool. It’s about finding the one that fits you and your goals right now. Whether that’s a free editor to get your feet wet or a more advanced suite for a passion project, the right software is whatever gets your ideas out of your head and onto the screen with the least amount of friction.
Your Path from Learning to Doing
The secret to building momentum is to start small. Your first project shouldn't be a feature-length epic. The goal is to get a quick, satisfying win that builds both your skills and your confidence.
- Whip up a 30-second highlight reel from your last trip.
- Film a quick one-minute tutorial explaining something simple you know inside and out.
- Create a short promo video for a personal project or a friend’s side hustle.
Just finishing a small project from start to finish is a massive victory. It proves you can navigate the software, make creative calls, and get something out the door. Each little success makes the next, more ambitious project feel that much more achievable.
The most important video you will ever edit is your first one. It’s not about perfection; it’s about breaking through the inertia and proving to yourself that you can actually do it. Everything gets easier from there.
The Next Step for Consistent Content
Once you’ve got a handle on the basics, you might notice that the real challenge isn't the editing itself—it's the sheer amount of time it takes to create content consistently. This is especially true if you're trying to keep up with the demands of social media. This is where AI-powered platforms can be a game-changer.
For creators looking to build a following on TikTok, YouTube Shorts, or Reels, tools like ShortsNinja are built for exactly this scenario. They take over the most draining parts of the process, like scripting and finding visuals, so you can focus on the bigger picture. It shrinks hours of work down to just a few minutes, making a consistent posting schedule feel less like a chore and more like a strategy.
Ready to stop learning and start creating? See what AI automation can do for your workflow. You can try ShortsNinja for free and see just how fast you can turn your ideas into polished, engaging videos today.
Frequently Asked Questions
Jumping into video editing for the first time? You've probably got questions. Let's clear up some of the most common ones so you can get started with confidence.
Do I Need an Expensive Computer for Video Editing Software?
Not anymore. While it's true that professional software like Adobe Premiere Pro loves a powerful machine, tons of video editing software for beginners is built to run just fine on everyday laptops.
The real shift has come from cloud-based and AI platforms. These services do all the heavy processing on their own servers, not your computer. That means you can create and export sharp, high-definition videos from just about any device with a web browser. Just be sure to check the minimum system requirements before you download any desktop software.
How Long Does It Take to Learn Video Editing?
That really depends on the tool you pick. Traditional, feature-packed software can feel overwhelming, often taking weeks or even months before you're comfortable. But on the flip side, intuitive editors designed for beginners can be picked up in just a few days.
The fastest way to get your first video out the door is with AI automation. You can go from zero to a professional-looking video in under ten minutes—no experience needed. It completely changes the game, letting you focus on your ideas instead of wrestling with complicated tools.
What Is the Difference Between Free and Paid Video Editors?
Free software is a great way to get your feet wet and learn the ropes, but it usually comes with some strings attached. You might find a permanent watermark plastered on your final video, a lack of advanced features, or no customer support when you inevitably get stuck.
Paid software typically removes all those headaches, giving you a full suite of professional tools and someone to call when you need help. AI platforms often use a subscription model, which gives you access to powerful automation for a predictable monthly fee—often much more affordable than buying a high-end software license outright.
Can I Make Money with Beginner Video Editing Skills?
Absolutely. There’s a massive demand for steady, quality video content on social media right now. If you have an efficient tool, you can pump out a consistent stream of videos for platforms like YouTube, TikTok, and Instagram Reels.
You could build an audience and monetize it, create promo videos for local businesses, or even manage social media accounts for clients. You don't need Hollywood-level skills to succeed. In today's creator economy, consistency and quality are king, and the right tools make both easier to achieve than ever before.
Ready to see how fast you can go from an idea to a published video? ShortsNinja uses AI to automate scripting, voiceovers, and visual creation, letting you produce high-quality short-form content in minutes. Start creating with a free trial today!