
Of course you can post videos from YouTube to Instagram—just not directly. The trick is to download your YouTube video first, then flip its format from horizontal to vertical (think 9:16 for Reels or Stories) before you upload it. This simple repurposing hack is a massive unlock for growth, turning one long-form video into potentially weeks of fresh Instagram content.
Why Bother Repurposing YouTube Videos for Instagram?

Slicing and dicing your content isn't just about saving a few hours. It’s a strategic play to get your work in front of more people on the platforms where they actually hang out. Instead of seeing your YouTube video as a one-and-done asset, start thinking of it as a goldmine of Instagram content just waiting to be excavated.
You’ve already put in the hard work to create a great long-form video. Now, it's all about slicing it into compelling, bite-sized clips that are perfect for Instagram’s fast-scrolling, vertical world.
Capitalize on the Obvious Audience Overlap
The link between YouTube and Instagram is undeniable, creating a huge opportunity for cross-promotion. The data doesn't lie: a massive chunk of your Instagram followers are probably already watching YouTube anyway.
Ever since Instagram dropped Reels back in August 2020, the platform has gone all-in on short-form video. An incredible 76.9% of Instagram's 2+ billion monthly active users also use YouTube, which means you have a massive built-in audience just waiting for your content. This shift has paid off for Instagram, with Reels now making up 50% of all time spent on the app.
By not sharing your YouTube content on Instagram, you're missing a chance to engage a huge segment of your audience that prefers short, vertical videos. It's like having a conversation in one room but ignoring the crowd waiting next door.
Give Your Engagement and Reach a Serious Boost
The Instagram algorithm is hungry for video, and it absolutely devours Reels. These short clips consistently blow static image posts out of the water, pulling in more likes, comments, shares, and saves. When you post your YouTube clips to Instagram, you’re feeding the algorithm exactly what it wants: snappy video content that keeps people on the app.
This strategy pays off in a few key ways:
- More Eyeballs: Reels are constantly pushed to non-followers through the Explore page and the Reels tab, putting your brand in front of totally new audiences.
- Sky-High Engagement: Influencers posting Reels are seeing a killer 2.08% engagement rate, while old-school video posts lag way behind at just 0.42%.
- Stay Consistent, Stay Sane: Repurposing helps you keep a steady posting schedule without the burnout that comes from creating brand-new content for every single platform.
By adapting your existing videos, you create a powerful flywheel. A great Reel can send people flocking to your YouTube channel, growing both of your platforms at the same time. For a deeper dive into making this work, check out our guide on effective content repurposing strategies.
A Quick Look at Instagram's Video Formats
Before you start chopping up your content, it’s good to know the lay of the land. Each Instagram video format has its own rules and best practices.
Here’s a quick cheat sheet to keep you on track.
Instagram Video Format Cheat Sheet
| Video Format | Aspect Ratio | Max Length | Best For |
|---|---|---|---|
| Reels | 9:16 (Vertical) | 90 seconds | Short, entertaining clips, trends, tutorials, and driving discovery. |
| Feed Video | 1:1 (Square) or 4:5 (Portrait) | 60 minutes | Longer tutorials, behind-the-scenes content, and in-depth explainers. |
| Stories | 9:16 (Vertical) | 60 seconds (per slide) | Casual updates, Q&As, polls, and driving traffic with link stickers. |
| Live | 9:16 (Vertical) | 4 hours | Real-time engagement, interviews, live events, and product launches. |
Understanding these formats is the first step. Reels are your best bet for reaching new people, while Feed videos and Stories are great for nurturing the audience you already have.
First, Let’s Talk About Copyright
Before you even think about downloading a video, we need to cover the legal stuff. Getting this wrong can get your account shut down, so it’s worth paying attention.
The simplest, safest, and frankly, best way to post YouTube videos on Instagram is to repurpose your own original content. When it's your footage, your audio, and your graphics, you own the copyright. That gives you the freedom to slice it, dice it, and post it anywhere you want without a single worry.
But the game changes the second you use someone else's video—even if it's just a tiny clip. Simply ripping a video from another YouTube channel and uploading it to your Instagram is a direct copyright violation. It's a fast track to getting your content removed or, worse, your account penalized.
The Real Risks of Using Other People's Content
Using someone else’s work without getting their okay first can lead to some serious headaches. Instagram's automated system can flag your video and take it down in an instant.
If that happens, you could get a copyright strike against your account. Rack up enough of those, and you risk a permanent ban. This isn't just an Instagram policy; it's a legal minefield.
Here’s what you need to watch out for:
- Using Video Clips: Grabbing a cool segment from another creator’s video requires their permission. Just giving them credit in the caption doesn't cut it legally.
- Using Popular Music: If you edit a video and drop in a hit song by a famous artist, you're asking for a copyright claim. Instagram has its own library of licensed music for Reels and Stories for a reason—uploading unlicensed audio is a big no-no.
- The "Fair Use" Myth: A lot of people think "fair use" is a magic wand that lets them use short clips for things like commentary or parody. In reality, fair use is a complicated legal defense, not a right, and it’s often decided in a courtroom. It's a huge gamble.
If you want to dig deeper into the legal side of things, there are great resources on potential intellectual property violations.
How to Stay on the Right Side of the Law
So, how do you navigate this safely? It all comes down to being smart and intentional about where you get your content.
The golden rule is simple: If you didn't create it, you need permission to use it. Don't assume crediting the original creator is enough—always seek explicit consent or use content that is clearly licensed for reuse.
Here are a few practical steps to keep your account safe and sound:
- Stick to Your Own Content First. This is your bulletproof strategy. No gray areas, no risks.
- Ask for Permission. See a clip you’d love to feature? Send the creator a DM or an email. Get their permission in writing before you post anything.
- Use Royalty-Free Libraries. For music and video clips, platforms like Epidemic Sound or Pexels are your best friend. They offer content with clear licensing terms, so you know exactly what you can and can't do.
Your Toolkit for Downloading and Preparing Videos
Alright, with the legal stuff out of the way, it's time to get our hands dirty. Turning your YouTube video into a polished, Instagram-ready post involves a few key steps, and it all starts with getting the highest quality video file you possibly can.
The absolute best way to do this is to download your own source file directly from YouTube Studio. This method sidesteps any extra compression that third-party tools might add, meaning you start the editing process with a perfectly crisp, clean video. It's the pro standard for a reason.
Of course, sometimes you might not have access to the original. In that case, you'll need a third-party downloader. Just be careful here—many online tools are loaded with sketchy ads or potential security risks. Stick to reputable options and never, ever install software from a source you don't trust.
Choosing Your Editing Software
Once you've got your video file, the real fun begins: editing. The good news is you don't need a Hollywood-level setup to create an amazing Reel. There are fantastic tools out there for every budget and skill level.
Here’s a quick rundown of some popular choices I've seen work well:
- For Quick Mobile Edits: Apps like CapCut and InShot are incredibly powerful and, best of all, free. They're perfect for trimming clips, adding text, and resizing your video right on your phone. If you're creating on the go, these are your best friends.
- For More Control on Desktop: Want more features without a massive learning curve? Clipchamp (now part of Microsoft) and Canva's video editor are excellent web-based options that give you a bit more breathing room.
- For Professional Results: For those who need total control over color grading, audio mixing, and complex effects, the industry standards are Adobe Premiere Pro and DaVinci Resolve. These are the heavy hitters.
As a quick reminder, this visual guide shows the safest path for handling video content to stay clear of copyright headaches.
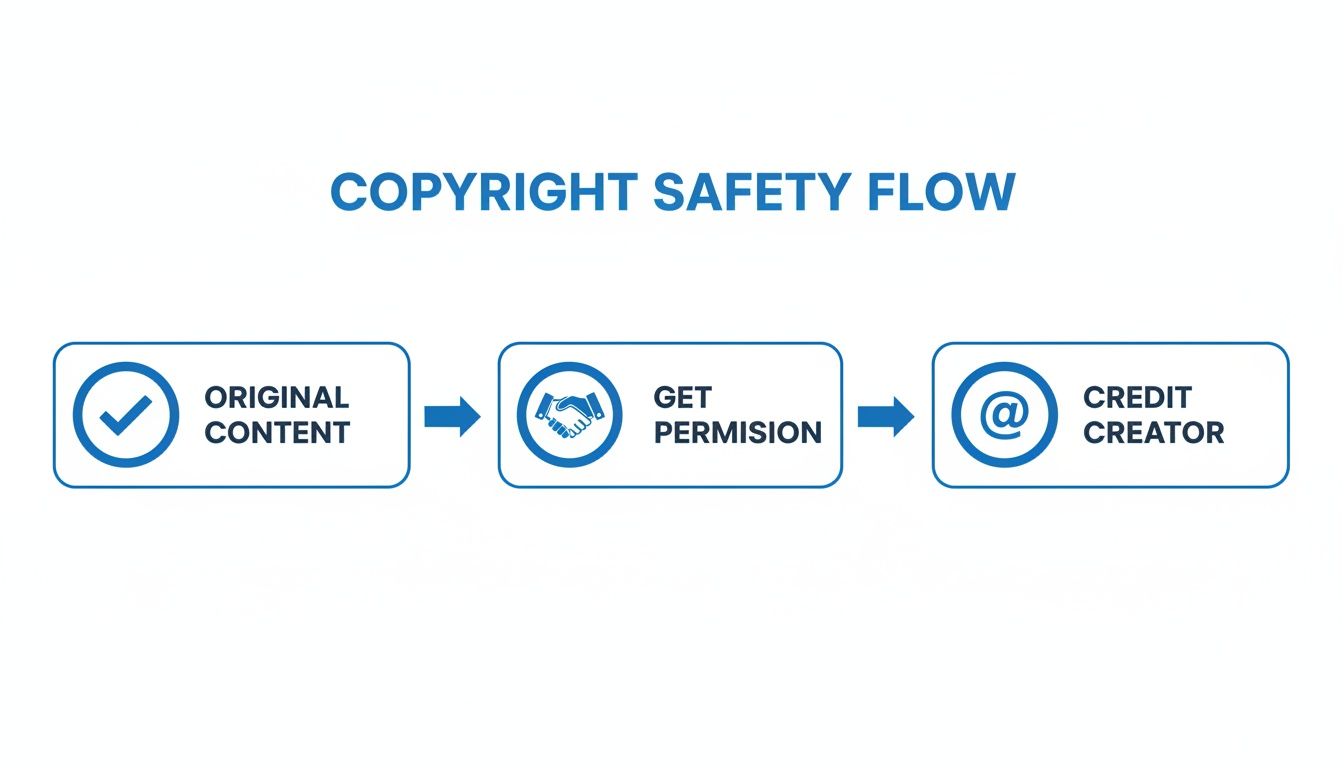
Starting with your own original content is always the most direct and secure route.
Transforming Horizontal Video for a Vertical World
The biggest technical challenge when you post videos from YouTube to Instagram is the aspect ratio. That cinematic 16:9 YouTube video needs to become a vertical 9:16 masterpiece to look at home on Reels or Stories.
Just chopping the sides off your horizontal video is a recipe for disaster. More often than not, the main subject gets awkwardly cut out of the frame, leaving you with a confusing, unwatchable mess. This is where reframing becomes absolutely critical.
Reframing isn't just about changing the video's shape; it's about redirecting the viewer's focus. You need to manually adjust the frame to follow the most important action, ensuring the core of your story remains visible in the vertical format.
Imagine you filmed a wide tutorial shot showing you demonstrating something on a table. A lazy center crop might completely cut off your hands or the very product you're talking about. The solution is to go into your editing software and use keyframes to "pan" the camera, following the action and keeping the important stuff in the shot at all times.
Most modern video editors have features built to help with this. Many now offer an "Auto Reframe" function that uses AI to analyze the video and track the subject for you. It's not always perfect, but it can be a huge time-saver and a fantastic starting point for your manual tweaks. This one step can be the difference between a video that screams "lazy repost" and one that truly captivates the Instagram audience.
Editing Clips for Maximum Instagram Impact
Just snipping a piece of your YouTube video and tossing it onto Instagram is a recipe for getting ignored. If you want people to actually stop scrolling, your content has to feel like it belongs on Instagram. It’s all about the small, creative tweaks that catch the eye and tell the algorithm your clip is worth showing to more people.
Those first three seconds are everything. Seriously. A viewer decides whether to keep watching or flick away in a literal instant. You need a powerful visual hook or a punchy text overlay right at the start. Forget the slow, fading intros from your YouTube version—jump straight into the action.
Add Captions and On-Screen Text
Let's be real: a massive number of people watch videos with the sound off. If you don't have captions, you’re talking to a wall. Your message is gone. Use your video editor or Instagram's own caption sticker to add subtitles that are clean and easy to read.
But don’t stop there. Go beyond basic captions and use dynamic text overlays to call out key takeaways or ask questions. This keeps the viewer’s eyes engaged and drives your point home, making the clip stick in their memory. If you're looking to really nail this, our guide on Instagram Reels best practices is packed with tips.
This whole strategy of cross-pollinating content between platforms is a game-changer. YouTube's potential ad reach sits at a massive 2.54 billion, while Instagram's is 1.74 billion. The overlap is huge, with data showing 76.9% of Instagram users hopping on both platforms daily. Turning your long-form content into Reels can result in 24% more shares for clips between 60-90 seconds and can even double your return on ad spend.
Embrace Native Instagram Features
The best way to get the algorithm to like you is to use the toys it gives you. When you use features that are popular on the platform, you're sending a clear signal that your content is current and relevant.
- Trending Audio: Is there a song or soundbite that’s suddenly everywhere? Add it to your video. You can even drop the volume to almost zero so it sits quietly behind your own audio, but you’ll still get a potential boost in reach.
- Interactive Stickers: When you’re posting to Stories, throw in a poll, a quiz, or a question sticker. These aren't just for fun; they drive direct engagement, which is a huge green light for the algorithm.
- Filters and Effects: You don't have to go wild, but applying a subtle, trending filter can help your video blend in seamlessly with what people are already watching.
Once you’ve got your clips optimized, you can dig even deeper into the nuances of posting, like sharing music on Instagram effectively.
Pro Tip: Your export settings are your final quality check. Don't let a blurry, pixelated video sabotage all your hard work. A low-quality clip just screams "unprofessional" and will send your engagement plummeting.
Nail Your Export Settings
Before you call it a day, take a second to dial in your export settings. Getting this part wrong can make a beautiful video look terrible. For the sharpest results on Instagram, here’s what you need to know.
| Setting | Recommendation | Why It Matters |
|---|---|---|
| Format | MP4 (H.264 codec) | This is the gold standard for social media. It guarantees your video will play on any device. |
| Resolution | 1080p (1080×1920) | This gives you that crisp, HD look without making your file size ridiculously large. |
| Frame Rate | 30 FPS | This is the sweet spot for smooth playback on Instagram and other platforms. |
| Bitrate | 3,500 kbps | A good bitrate is your defense against ugly compression artifacts, keeping your video clean. |
Following these simple editing principles will make all the difference. Your repurposed clips will go from looking like leftovers to feeling like premium content made specifically for your Instagram audience.
Work Smarter, Not Harder: Automating Your Workflow
Let's be real. Manually downloading, cropping, reframing, and captioning every single clip will burn you out. Fast. Especially if you're trying to post consistently.
While getting your hands dirty with the manual process gives you ultimate creative control, it’s just not sustainable if you want to scale. This is where you can start working smarter.
Modern automation tools are built to handle the most tedious parts of this entire process. Instead of spending hours scrubbing through a long video to find that one perfect clip, these platforms use AI to find it for you.
How Automation Completely Changes the Game
Imagine this: you drop a single YouTube video link into a tool and get back a handful of polished, ready-to-post Instagram Reels. That’s what we’re talking about. These platforms can analyze your video’s transcript and visuals to automatically pinpoint the most engaging or viral-worthy moments.
This isn't about giving up quality; it's about getting your time back. By letting technology handle the repetitive stuff, you can shift your focus from mind-numbing editing to high-level strategy—like planning your content calendar or actually engaging with your community.
Here's what you should look for in these tools:
- AI Clip Finding: Automatically sniffs out the most compelling segments from your long-form videos.
- Auto-Reframing: Intelligently crops your horizontal 16:9 video into a vertical 9:16 format, making sure the main subject always stays in the frame.
- Automated Captions: Generates and styles subtitles to grab the attention of viewers watching with the sound off.
The real win with automation isn't just about speed; it's consistency. When you can batch-create a week's worth of high-quality Instagram content in under an hour, you're way more likely to stick with your strategy and see real, long-term growth.
Finding the Right Repurposing Tool for You
There are a ton of options out there, each with its own vibe. Some tools, like Opus Clip or Vidyo.ai, are laser-focused on identifying viral moments and spitting out short clips at lightning speed. These are perfect for creators who want to rapidly test different hooks and ideas without a huge time investment.
But if you want a bit more control over the final cut while still getting a major assist from AI, platforms like ShortsNinja offer a great middle ground. It can help generate visuals, add realistic voiceovers, and streamline the editing, giving you a powerful AI assistant without hijacking the creative process. The key is to find a tool that slots right into your existing flow.
Go Beyond Repurposing with Full Automation
Once your clips are edited and ready, the next bottleneck is actually getting them posted. And guess what? This is another area where automation can be a lifesaver. Instead of manually uploading each video to Instagram at the "perfect" time, you can schedule everything to go out automatically.
Platforms like Later or Buffer are the big names in social media scheduling, but some repurposing tools now have this functionality built right in. This lets you create a true end-to-end content machine: find clips, edit them, and schedule them for the entire week or month in one sitting.
You can dive deeper into this strategy in our guide to automated social media posting. An integrated workflow like this is the secret to maintaining a powerful presence on Instagram without letting it completely take over your life.
Got Questions About Turning YouTube Videos into Instagram Gold?
Even with a solid game plan, a few questions always pop up when you start repurposing YouTube videos for Instagram. Let's tackle the big ones so you can move forward without any guesswork.
Can I Just Post My Entire YouTube Video to Instagram?
In short, no—and honestly, you wouldn't want to. Instagram is all about quick, digestible content, and its formats have pretty strict time limits. For instance, Instagram Reels, which give you the best shot at organic reach, top out at 90 seconds.
The real winning strategy isn't trying to squeeze a long video onto a platform that isn't built for it. Instead, think of your Instagram clips as high-energy trailers. Your goal is to pull out the most exciting, valuable, or flat-out entertaining moments that make people so curious they have to check out the full video on your YouTube channel.
Will I Get a Copyright Strike for Reposting a YouTube Video?
You're in the clear as long as you're only posting your own original content. You own the rights, so you can slice, dice, and repurpose it anywhere you like, zero risks involved.
The danger zone is when you start reposting content made by someone else without getting their explicit permission first. Instagram's automated systems are surprisingly good at flagging copyrighted music and video clips, which can get your post taken down, your audio muted, or even a strike against your account. Stick to repurposing your own work, and you'll never have to worry.
Quick heads-up: Tossing a "credit to the owner" in your caption is a nice gesture, but it’s not a legal pass. The only way to be 100% safe is to use content you created yourself or have a license for.
What's the Best Format for My Repurposed Clips?
No question about it: Instagram Reels are your best bet. They are built from the ground up for the vertical, short-form video that absolutely dominates the platform right now.
The Instagram algorithm is heavily biased toward Reels, actively pushing them into the Reels feed and onto the Explore page for fresh audiences to discover. This gives your repurposed clips a much, much higher chance of going viral and reaching thousands of people who've never even heard of you. Turning the best moments from your YouTube videos into snappy Reels is easily the most powerful growth hack you have.
How Do I Add Subtitles to My Instagram Videos?
Adding subtitles isn't just a nice-to-have; it's essential. A massive chunk of users scroll through their feeds with the sound off, so captions are non-negotiable if you want your message to land.
Luckily, it’s easier than ever. Here are a few great options:
- Editing Apps: Tools like CapCut have fantastic auto-captioning features that do all the heavy lifting for you.
- Instagram's Built-in Sticker: When you’re uploading a Reel, just tap the sticker icon and find the "Captions" sticker. It will automatically transcribe your audio right there in the app.
- Automation Tools: A lot of repurposing tools, including ShortsNinja, will generate and burn in stylish, easy-to-read captions for you as part of the workflow.
Ready to stop wasting hours on manual edits and finally automate your content workflow? ShortsNinja uses AI to instantly find the most viral-worthy clips in your long-form videos, perfectly reframe them for Instagram, add captions, and help you build a consistent posting schedule in just a few minutes. Try ShortsNinja today and see how easy it can be.