
You've poured hours into creating the perfect YouTube video, but what happens after you hit publish? If you just let it sit on YouTube, you're missing a massive opportunity. Posting a video from YouTube to Instagram is about more than just finding a downloader—it’s a smart strategy called content repurposing.
Think of it as making your best content work smarter, not harder. It requires a bit of finesse: downloading your video, reformatting it for a vertical screen, and chopping it up to fit Instagram’s bite-sized formats like Reels or Stories. Done right, it can supercharge your reach and squeeze every last drop of value from your hard work.
Why Post Your YouTube Videos on Instagram
Trying to create completely original video content for every single platform is a fast track to burnout. I see so many creators treat YouTube and Instagram like two separate universes, and it’s a huge strategic mistake. Instead of grinding away to produce unique daily content for each, you can build a bridge between these two video powerhouses.
Expand Your Audience and Reach
The biggest win here is tapping into totally different audiences. Let's be real: the person who settles in for a 20-minute deep dive on YouTube isn't the same person doomscrolling through 60-second Reels on their lunch break. Repurposing lets you meet both of them right where they are.
This isn't some niche hack; it's a mainstream growth strategy for a reason. In 2023, YouTube had over 2.5 billion active users watching a mind-boggling billion hours of video every day. At the same time, Instagram crossed 2 billion monthly active users, with Reels eating up nearly 50% of the time people spend on the app. The numbers don't lie. If you're only on YouTube, you're leaving a massive chunk of the world's video audience on the table. You can dig into more of these stats over at Digital Joy Media.
The goal isn't just to rack up more views. It's about introducing your best work to a fresh set of eyes that might never have stumbled upon your YouTube channel otherwise.
Get More Value from Your Best Content
Take a second to think about your top-performing YouTube video. It’s probably packed with golden nuggets—powerful moments, key takeaways, or just plain entertaining clips. Every single one of those moments is a potential standalone hit on Instagram.
Here’s how this completely changes your workflow:
- From One to Many: That single 15-minute product review you filmed? It can be sliced and diced into a whole series of high-impact Reels. You could pull out the unboxing for one Reel, a specific feature highlight for another, and the final verdict for a third. Boom, three pieces of content from one.
- Increased Content Velocity: Repurposing is your secret weapon for maintaining a consistent posting schedule on Instagram without the constant pressure to create from scratch. And as we all know, consistency is what the algorithm craves.
- Cross-Platform Promotion: Each Reel or Story becomes a teaser trailer for the main event. It piques curiosity and drives viewers back to your YouTube channel for the full, in-depth experience. This creates a powerful feedback loop that grows both of your accounts at the same time.
Navigating Copyright and Permissions Before You Post
Alright, before you dive in and start downloading videos, we need to talk about the rules of the road. It’s the boring part, I know, but it’s absolutely critical.
If you're just reposting your own YouTube videos, you’re golden. No problems there. But the second you decide to post a video from someone else’s YouTube channel to your Instagram, you’ve entered the tricky world of copyright law.
Don't just brush this off. Ignoring the rules isn't just a bad look; it can get you in real trouble. Instagram has automated systems that are constantly sniffing out copyrighted material. If you get caught, your video could be muted or completely taken down. Worse, your account could get a strike, which might lead to a full-on suspension. It’s a massive headache that’s just not worth the risk.
Understanding Fair Use and Creative Commons
You’ve probably heard people throw around the term Fair Use, but honestly, most don’t really get what it means. Fair Use is a legal concept that lets you use copyrighted stuff without permission for things like criticism, news reporting, or research. The catch? It's a defense you use in court, not a free pass. The lines are blurry and subjective. Just adding a quick comment or swapping the music probably won't cut it.
A much safer bet is to hunt for videos with a Creative Commons (CC) license. Think of it as a creator giving you pre-approved permission to share and use their work. Some CC licenses are super flexible, allowing you to modify and use the video for commercial purposes. Others might just ask for you to give them credit. Always, always check the specific license terms in the YouTube video's description before you do anything.
The absolute safest, most respectful way to go? Just ask the original creator for permission. It keeps you on the right side of the law and helps you build a good reputation in the creator community.
Asking for Permission the Right Way
Reaching out to another creator doesn’t have to be awkward. A simple, polite message is usually all it takes. You can typically find their contact info on their YouTube channel's "About" page or sometimes linked in their video descriptions.
Feel free to adapt this template:
- Subject: Love your video! Question about sharing on Instagram.
- Body: Hi [Creator's Name], I'm a huge fan of your content, especially your video "[Video Title]." I think my audience on Instagram (@YourInstagramHandle) would really enjoy it. Would you be open to me sharing a clip from it as an Instagram Reel? I would, of course, give you full credit in the caption and tag your account. Thanks for your time!
And when you do get permission, crediting them properly is non-negotiable. This means more than a throwaway mention. A solid credit involves tagging their Instagram handle directly in your caption and, if you can, on the video itself. This is the same professional courtesy we talk about in our guide for posting YouTube videos on Facebook. Follow these steps, and you can share amazing content while respecting the artists who created it.
The Manual Method for Editing and Repurposing
If you're ready to get your hands dirty, taking the manual route gives you total creative control. This is where you can really put your own spin on things. It boils down to a few key stages: getting the video file, reformatting it for Instagram’s vertical world, and trimming it down to just the good stuff.
First up, you need the video file itself. If it’s your own content, this part is a breeze. Just pop into your YouTube Studio, find the video you want to use, and download the original MP4 file. Doing it this way ensures you’re starting with the highest quality version possible.
Now, if you're working with a video you didn't create, you have to be smart about copyright. It's not the wild west out there. This process is crucial for staying on the right side of the rules and respecting the original creator.
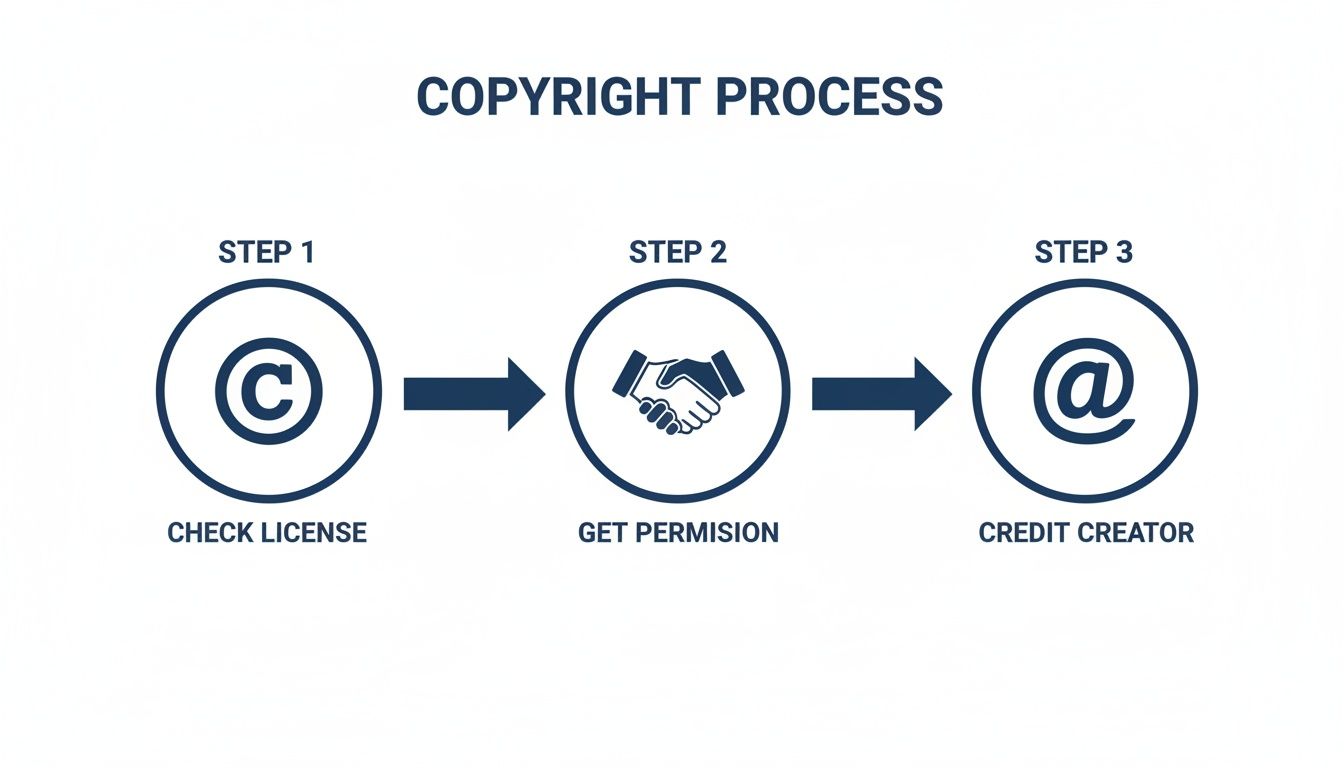
This simple, three-step flow—checking the license, getting permission, and giving proper credit—is the bedrock of ethical content repurposing. Don't skip it.
Resizing and Reformatting for a Vertical Screen
Once you have the video file, it's time for the real transformation. Most YouTube videos are filmed in that wide, horizontal 16:9 aspect ratio. On Instagram, that just looks awkward and out of place. Your mission is to convert it into a vertical 9:16 for Reels and Stories or a neat square 1:1 for feed posts.
You can use all sorts of video editing tools for this. Mobile apps like CapCut or InShot are great for quick edits on the go, while desktop software like Adobe Premiere Rush gives you a bit more power.
Here’s how it usually goes down:
- Import Your Video: Fire up your editor and pull in the YouTube clip you downloaded.
- Set the Aspect Ratio: The very first thing you should do is create a new project and set the canvas to 9:16 (usually 1080×1920 pixels).
- Reframe the Shot: Your horizontal video will look tiny, sandwiched between huge black bars. You’ve got a couple of solid options to fix this:
- Punch In: This is the most common move. You scale up the video until it fills the whole vertical frame. The catch? You'll crop out the sides of the original shot. You’ll have to slide the video around to make sure the main action stays dead center.
- Use a Blurred Background: Another popular technique is to keep the original video as-is, then drop a blurred and stretched-out version of the same clip in a layer behind it. This fills the empty space without you having to sacrifice any of your original footage.
A huge mistake I see all the time is people simply rotating a horizontal video to fit the vertical frame. This forces viewers to turn their phones sideways, which is a terrible user experience. Nobody does that. It's an instant scroll-past. Always reframe, never just rotate.
Keeping track of Instagram's specs can be a headache. Here’s a quick cheat sheet to make sure your repurposed clips are perfectly formatted every time.
Instagram Video Format Requirements at a Glance
| Instagram Format | Aspect Ratio | Max Length | Recommended Resolution |
|---|---|---|---|
| Reels | 9:16 | 90 seconds | 1080 x 1920 pixels |
| Stories | 9:16 | 60 seconds (per clip) | 1080 x 1920 pixels |
| Feed Video | 1:1 or 4:5 | 60 minutes | 1080 x 1080 or 1080 x 1350 pixels |
| Carousel Video | 1:1, 4:5, or 16:9 | 60 seconds (per clip) | 1080 x 1080 or 1080 x 1350 pixels |
This table should help you nail the technical side of things so you can focus on the creative edit.
Trimming for Instagram’s Shorter Formats
With your video looking good in its new vertical format, the final step is to get ruthless with the trim tool. A 10-minute YouTube deep-dive just isn't going to fly on Instagram, where you have maybe three seconds to grab someone's attention. You need to scrub through your footage and pull out the "golden nuggets"—those short, impactful moments that tell a story on their own.
Here are the time limits you’re working with:
- Instagram Reels: You get up to 90 seconds. Your goal should be a punchy clip that delivers value or a quick laugh almost instantly.
- Instagram Stories: Individual clips max out at 60 seconds. But the beauty here is you can string several clips together to build a longer narrative.
The key is to create a self-contained, compelling piece of content within these tight constraints. A perfectly trimmed clip shouldn’t feel like a random snippet—it should feel like it was made for Instagram from the start. This hands-on editing is what separates repurposed content that feels native from content that just feels lazy.
Optimizing Your Repurposed Video for Maximum Engagement
Alright, you've got your YouTube video downloaded, clipped, and resized for Instagram. But simply dropping it onto the platform is only half the battle. This next part is what separates a lazy repost from a piece of content that actually performs. We’re talking about making your video feel completely native to Instagram.
People on Instagram scroll fast. Really fast. You have maybe three seconds to grab their attention and stop them in their tracks. That makes the first line of your caption absolutely critical. It has to be a hook—a bold statement, a relatable question, or something intriguing enough to make them pause.
Once you have their attention, your mission is to drive interaction. Don't just post and pray for comments; you need a clear call-to-action (CTA) that tells people exactly what to do.
- "Which of these tips was your favorite? Let me know below."
- "What's the biggest challenge you face with [topic]? Share your story."
- "Tag a friend who needs to see this!"
These direct prompts give your audience a reason to engage, which is a powerful signal to the algorithm that your content is worth showing to more people. To really get this right, it pays to understand how the Instagram algorithm works and what it rewards.
Crafting a Winning Hashtag Strategy
Hashtags are your secret weapon for getting discovered. But just slapping on generic tags like #video is a waste of time. A smart strategy uses a mix of different hashtag types to cast a wide net without getting lost in an ocean of content.
I like to think of it as a pyramid:
- Broad & Popular (1-2 tags): These are the high-volume tags like
#contentcreatoror#digitalmarketing. They’ll give you a quick, initial burst of visibility. - Specific & Niche (3-5 tags): This is where you target your ideal audience more directly. Think
#videorepurposingor#youtubetipsforbeginners. This is how you find your community. - Unique & Branded (1 tag): This is a tag unique to your brand, like
#ShortsNinjaTips. It helps organize your content and builds a recognizable presence over time.
This tiered approach ensures you’re reaching a broad audience while also connecting with the people most likely to actually follow and engage with you.
Adding Native Instagram Elements
The final touch is to make your repurposed video look like it was made for Instagram. This means using the platform's own features to add that extra layer of polish. When you're posting a video from YouTube to Instagram, these small details make a massive difference.
When a video feels native, it performs better. It taps into Instagram’s powerful video-driven user behavior. A staggering 58% of people become more interested in a brand after seeing it in Stories, and one in four consumers has bought something directly after viewing a Story.
For Instagram Stories, toss in interactive elements like polls, quizzes, or question stickers to invite direct participation. For Reels, find a trending audio track and layer it quietly underneath your original audio—this simple trick can give your video a serious algorithmic boost.
Making sure your video clips are perfectly timed is also key. Check out our guide to find the best video lengths for different platforms to make sure your content is perfectly tailored. These native touches are the final step in turning a YouTube clip into an Instagram success story.
Using AI Tools to Automate Your Workflow
Let's be real: manually downloading, resizing, and trimming every single clip is a massive time sink. It works, sure, but for creators who want to scale their output, that hands-on process quickly becomes the biggest bottleneck. Spending hours in an editing timeline just isn't sustainable if you're trying to post consistently.
This is where AI-powered tools completely change the game. Imagine having a personal video editor that can scan a 20-minute YouTube video, pinpoint the most engaging moments, and automatically slice them into a dozen ready-to-post clips. That's what we're talking about here.
Let AI Do the Heavy Lifting
The magic of these tools is how they solve the most tedious parts of repurposing. Instead of you scrubbing through hours of footage to find the gold, the AI does it for you.
- Smart Clipping: The AI is trained to identify hooks, key questions, and climactic moments. It then isolates these segments, making sure every short clip feels like a complete thought.
- Automatic Reframing: These platforms can automatically re-center the action for a vertical 9:16 screen. Doing this by hand, frame by frame, is incredibly monotonous.
- Dynamic Captions: Many tools also generate and animate captions on the fly—a must-have feature since so many people on Instagram watch videos with the sound off.
AI automation isn't about replacing your creativity. It's about freeing you from the repetitive tasks that drain it, so you can spend more time on strategy and community engagement.
An automated approach makes the whole YouTube-to-Instagram process so much more efficient. Instead of squeezing one or two clips out of a long video, you can effortlessly generate ten or more. That kind of output is almost impossible to maintain with manual editing alone.
Choosing the Right Automation Platform
The market for AI video tools is blowing up, with platforms built for all sorts of needs. Some are purely for clipping, while others offer a full suite of editing and scheduling features.
For instance, platforms like ShortsNinja are built from the ground up to turn long-form videos into a high volume of engaging short clips with minimal effort. If you're curious about what else is out there, we've got a detailed guide on different types of AI video editing tools.
To take it even a step further, you can look into various AI video creation tools that can generate new video segments or transform existing ones. By weaving these solutions into your workflow, you build a powerful system that turns one pillar piece of content into a steady stream of optimized clips for every platform. It's how you grow without burning out.
Got Questions About Posting YouTube Videos to Instagram?
Even with the best game plan, you're bound to run into a few questions when trying to make content from two completely different platforms play nicely together. Taking a video from YouTube and getting it ready for Instagram can feel a little clunky at first, but trust me, most of the common hurdles have simple fixes.
Let’s walk through some of the questions I hear all the time from other creators.
Can I Just Post My Whole YouTube Video to Instagram?
The short answer? No, and you really shouldn't want to.
While Instagram technically lets you upload videos up to 60 minutes long to your feed, it's almost always a terrible idea. Think about how you use Instagram—you're scrolling for quick, punchy, entertaining content, not a long-form documentary. The user behavior is just fundamentally different.
A much smarter strategy is to look at your YouTube video as a goldmine of smaller content pieces. Your job is to pull out the best highlights, the most shocking moments, or the most valuable tips that can stand on their own. Turn them into Reels or Stories that act like trailers for your main event over on YouTube.
What's the Best Video Quality for Instagram?
This one trips a lot of people up. Instagram is notorious for compressing video files to save space and keep things loading quickly on phones. To give your content the best fighting chance, you have to start with a high-quality file.
Here are the specs that actually matter:
- Export Resolution: Stick to 1080p (that's 1080×1920 pixels for vertical video). Anything higher is just overkill and will get squashed down by Instagram's compression anyway.
- Frame Rate: 30 FPS (frames per second) is the sweet spot. It’s the standard for the platform and gives you that smooth playback everyone expects.
- File Format: MP4 is your best friend here. It’s the perfect blend of quality and manageable file size, and it works everywhere.
The biggest mistake I see is people uploading a grainy, low-res clip and hoping Instagram will magically sharpen it. It won't. Always export a clean, high-quality version from your editor to feed Instagram’s algorithm the best possible source file.
How Do I Add Subtitles to My Repurposed Clips?
Let's be clear: adding subtitles isn't just a nice-to-have anymore. It's a must. A huge percentage of people watch Instagram videos with the sound completely off. If you don't have captions, your message is lost.
Manually transcribing and timing subtitles is a soul-crushing task. This is where automation becomes a total game-changer.
Modern video editors and specialized AI tools like ShortsNinja have auto-captioning built right in. They use speech-to-text tech to generate the subtitles in seconds. From there, you can do a quick proofread, tweak the style to match your brand, and you're done. This one step makes your content more accessible and can seriously boost how long people stick around to watch.
Ready to stop wasting time on manual edits and start generating a month's worth of content in minutes? ShortsNinja uses AI to automatically find the best moments in your YouTube videos, add captions, and format them perfectly for Instagram. Try it for free today!