

I’ve led training video projects for teams in finance, healthcare, and tech—and the secret to success always comes back to three fundamentals: nailing your goals, building a solid script, and delivering the final cut to your audience. When you zero in on clear learning objectives and keep your messaging tight, retention spikes.
Quick Overview Of Effective Training Videos
Every engaging training video kicks off with crystal-clear learning objectives that speak to real challenges your audience faces.
Your script serves as the backbone—guiding visuals, voiceovers, and pacing so learners stay on track from intro to outro.
- Defining Goals: Keeps your video focused on core outcomes and steers clear of rabbit holes.
- Crafting the Script: Sets the narrative flow, holding attention through each segment.
- Choosing Platforms: Match your content to channels that offer analytics and feedback loops.
- Reviewing Metrics: Use engagement data to sharpen future videos and boost completion rates.
Recent forecasts show the global training video production services market reaching USD 1,165 million by 2033, with a steady 3.8% CAGR from 2025 to 2033 as companies replace static presentations with dynamic learning. Explore the full training video production market projections for more detail.
Key Steps For Training Videos
Below is a quick reference table summarizing each core stage, its purpose, and my top tip for making every minute count.
| Step | Purpose | Pro Tip |
|---|---|---|
| Define | Establish measurable learning objectives | Tie goals to everyday tasks for instant relevance |
| Script | Outline scenes and dialogue | Break voiceovers into bullet points for clarity |
| Launch | Publish with tracking enabled | Embed a one-question survey at the video’s end |
Keep this table handy as you move through each stage—refer back when you need a quick reminder of what matters most.
“Clear planning and scripting boost retention and engagement compared to static manuals.”
Visual Workflow Infographic
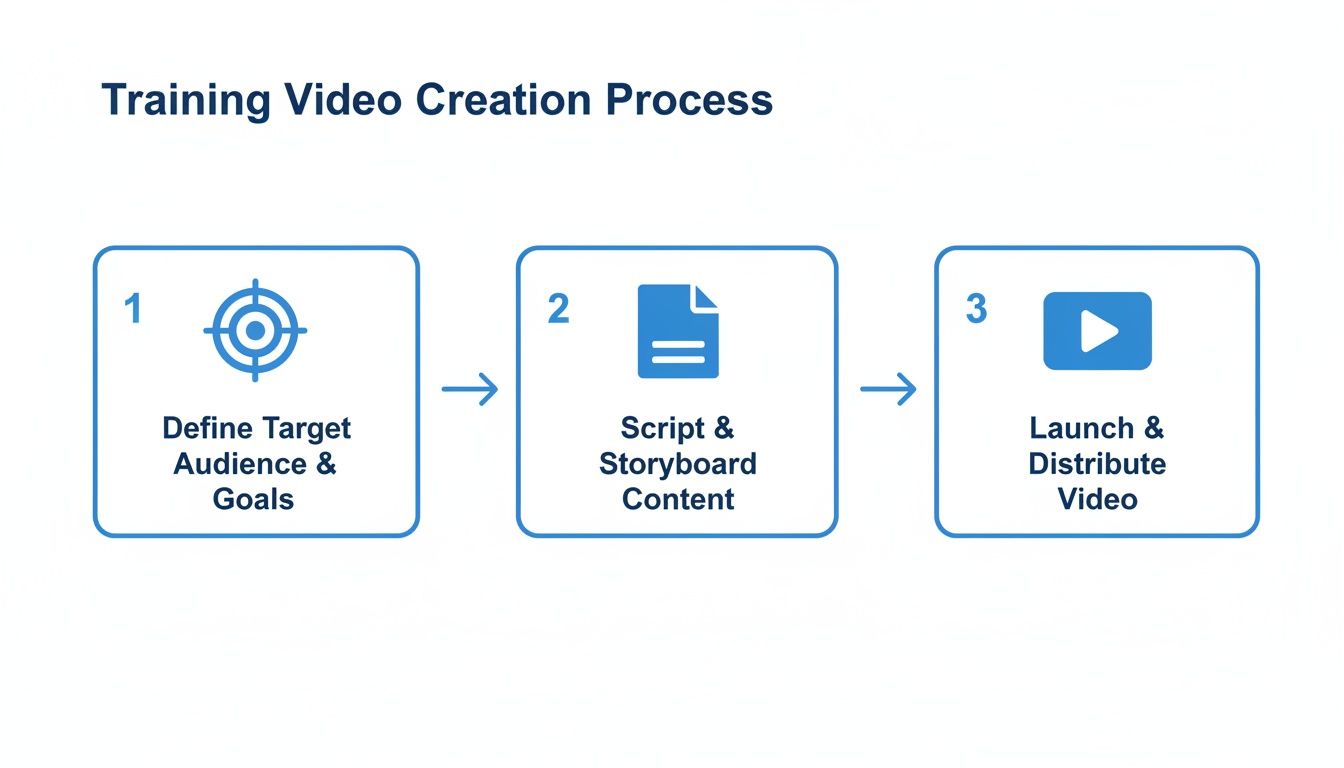
This graphic lays out how momentum carries you smoothly from planning to scripting and right through to launch—ensuring nothing falls through the cracks.
Planning And Scripting To Engage Learners
Before diving into visuals or voice-overs, take a moment to pinpoint the exact performance gaps your audience faces. That sharp focus not only shapes your script but also informs every design choice, from tone of voice to pacing.
Once you’ve identified those learner needs, everything clicks into place—your message feels relevant, and retention goes up.
Crafting A Focused Storyboard
Begin by sketching scenes with a simple fill-in-the-blank outline. It’s a fast way to link objectives to visuals without getting lost in side stories.
- Learning Gap: Start with “Learner should be able to…” and name the skill or insight.
- Visual Cue: Note where graphics, animations, or text callouts reinforce key ideas.
- Interaction Prompt: Plan a quick quiz or reflection pause after each segment.
Next, keep each objective clear and avoid scripts that run past five minutes. A tight storyboard can cut revision time in half and keeps teams aligned on purpose.
Scene 1 Problem Intro 15s
Scene 2 Demonstration 45s
Scene 3 Quiz Prompt 10s
Use this mini-template to tweak timing on the fly and maintain a steady content flow.
Writing Engaging Scripts
Scripts under 300 words pack a punch in microlearning modules. Open with a question readers see themselves in—instant engagement.
Adjust your tone to fit the audience:
- Casual Tone invites learners to unwind and absorb.
- Formal Tone works best for compliance or technical deep dives.
- Enthusiastic Tone brings energy and keeps momentum high.
Weave in a true/false quiz right after major points to reinforce retention and spark active thinking. For more on crafting scripts that resonate, check out Script Writing for Beginners.
Incorporating Reflection Breaks
Quiet moments make space for learners to connect the dots. Drop in prompts like “Why does this matter to your role?” twice in a module. These pauses turn passive viewers into active participants.
Screenshot Of Usage Trends
Here’s a snapshot of video usage trends among marketers.
It shows 73% of marketers creating explainer videos compared to 20% focusing on training, underscoring the gap in instructional content.
Case Study Boosting Onboarding
A global retailer slashed onboarding time by 40% by weaving in reflection breaks. They simply asked, “Pause and think how you’d apply this” right after each demo—and watched engagement climb.
Comparison Of Video Types And Usage Stats
Below is a quick look at how different video formats stack up in terms of popularity and best-fit scenarios.
| Video Type | Usage Percentage | Ideal Use Case |
|---|---|---|
| Explainer Video | 73% | Product overviews and demos |
| Training Video | 20% | Employee skill development |
| Microlearning | 7% | Quick tips and refreshers |
This snapshot should steer you toward the format that aligns with your training goals.
Visualizing Learning Objectives
Right from the start, tie each scene to a clear outcome. Write one learning objective per scene, then pick visuals that illustrate it. Real-world examples drawn from your team’s daily tasks make scenarios feel genuine. If you can, chat with a top performer for authentic, on-the-job insights.
Avoiding Common Scripting Pitfalls
Jargon can alienate. Stick to plain language so everyone follows along. And don’t overload a single video—break complex ideas into bite-sized modules for better comprehension.
Structuring For Engagement
Alternate demonstration, explanation, and reflection to keep the rhythm fresh. Slide in question prompts every 60 seconds to recapture wandering attention. In one project, a two-question poll at mid-point bumped completion rates by 30%.
Integrating Interactive Elements
Whenever possible, add clickable hotspots or branching scenarios for a more personalized path. Even simple fill-in-the-blank script notes prepare you for slick quiz designs later on.
Key Takeaways And Next Steps
A solid plan and script will save your team countless hours in edits:
- Clear Objectives anchor visuals, narration, and quiz placement.
- Micro Scripts under five minutes boost focus and completion.
- Storyboards serve as visual roadmaps, cutting miscommunication.
- Reflection Breaks and quizzes deepen retention and encourage real-world application.
Ready to script your training video? Take these pointers and bring your plan to life.
Aligning With Business Goals
Always tie each video objective to a measurable KPI—whether that’s reduced error rates, faster onboarding, or a noticeable uptick in sales. That way, your learners succeed and the bottom line benefits too.
Producing Videos With Or Without A Presenter

Deciding if you’ll step in front of the camera or stay off-screen shapes every choice—from gear to postproduction.
On-camera, you’ll focus on angles, lighting, and crystal-clear audio. Off-camera, you lean on narration, animations, and text to tell the story.
- 45-Degree Camera Angle: Framing at eye level and slightly off-center keeps engagement high.
- $50 Softbox Hack: Blend daylight with a budget softbox for smooth, flattering light.
- Clear Audio Gear: A lapel mic or USB condenser cuts background noise and delivers crisp vocals.
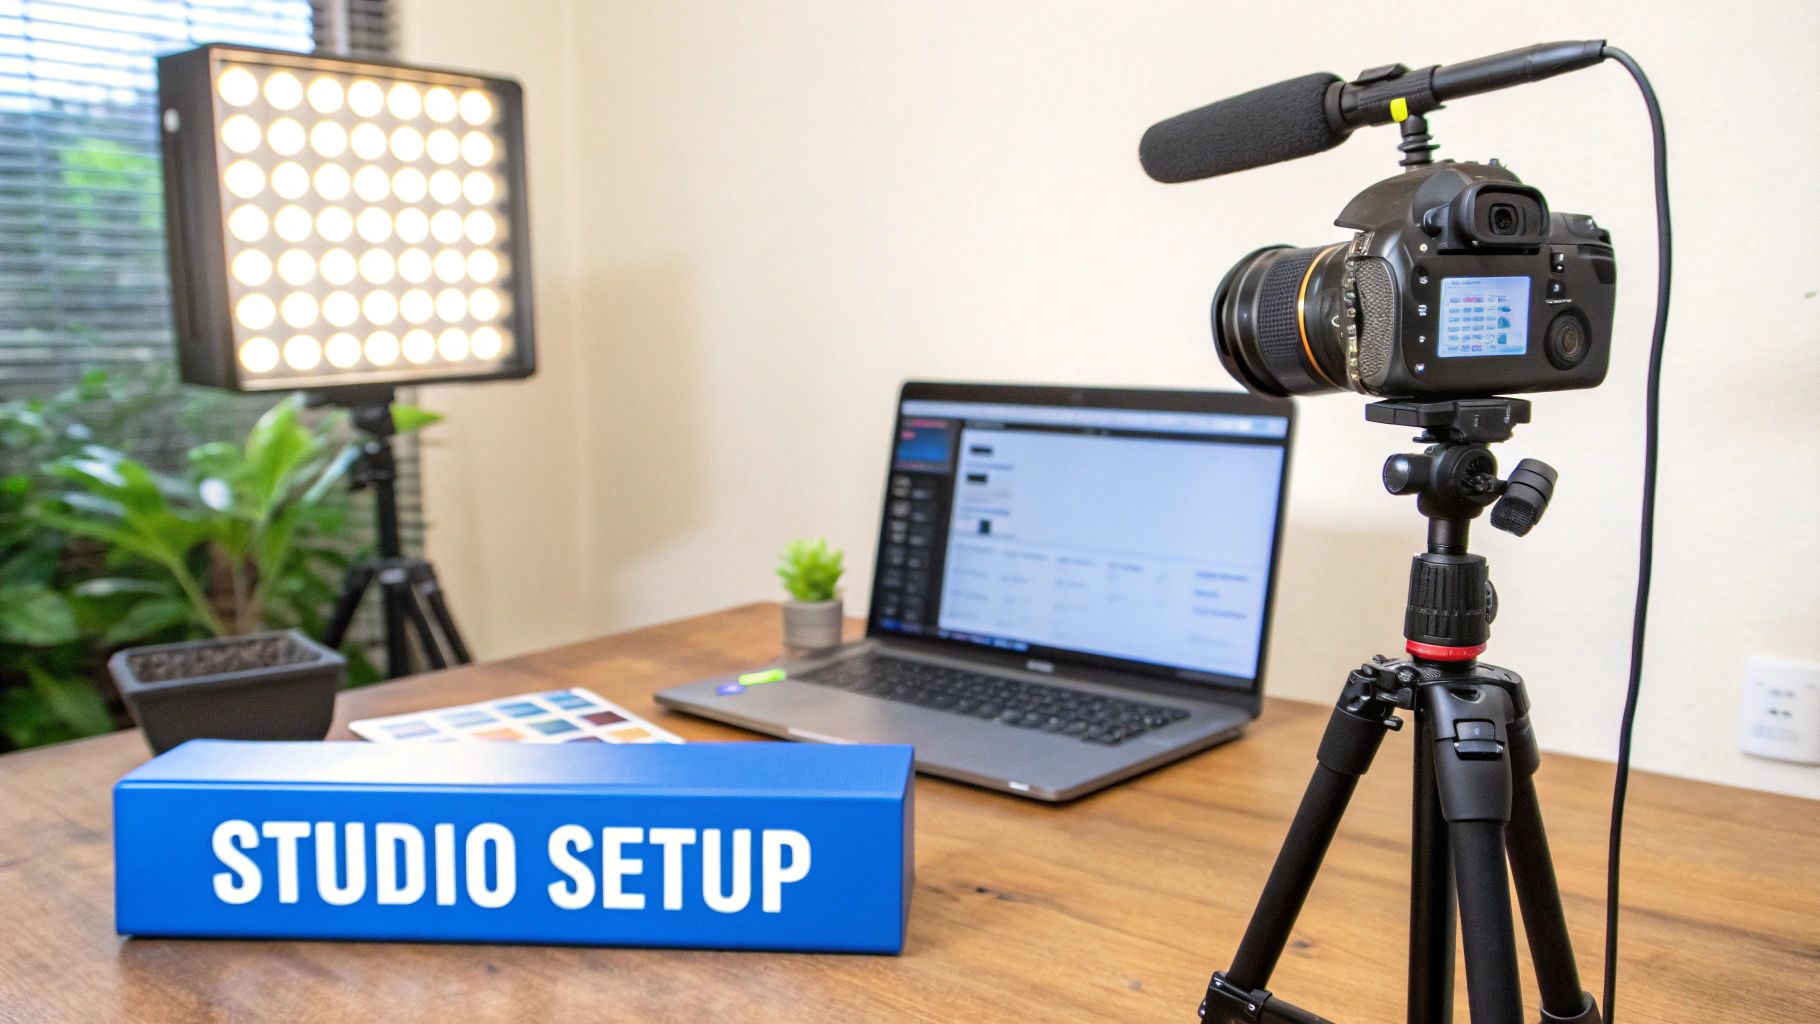
Setting Up Home Studio
Clear distractions and pick a quiet corner with minimal echo.
Lock your camera on a sturdy tripod, then fine-tune angles at eye level so each take matches.
Soft, diffused light sources ease shadows and guide viewers’ attention to your message.
- Mark the floor with gaffer tape for repeatable positioning.
- Label your camera and light settings to jump back in instantly.
Adding Faceless Video Options
Want to skip the on-camera work? These tactics keep your content moving:
- AI Narration: Slashes solo editing time by 30%, freeing you for planning.
- ElevenLabs Speech: Realistic voices in 50+ languages open global doors.
- Animated Slides: Export polished sequences from PowerPoint, Pitch, or similar apps.
For extra polish, layer on AI avatars or screen recordings with clear text callouts.
Showing A Developer Case Study
One software engineer we know plugged in AI voiceovers for internal demos and cut editing by 30%. The result: more weekly training content—no extra team members needed.
“AI voiceovers freed our team to focus on content rather than edits.”
Screenshot Of AI Video Interface
The screenshot below shows an AI tool interface mapping script segments to voice tones.
Notice the voice tone options and timing controls laid out for quick tweaks.
Troubleshooting Production Bumps
Even small hiccups can derail a shoot. Here’s how to stay on track:
- Background Buzz: Add foam windshields or switch your mic to a cardioid pattern.
- Glasses Glare: Tilt the camera down a touch or raise lights above eye level.
- Choppy Video: Lower resolution or close CPU-hungry apps during recording.
- Flat Lighting: Introduce a fill light or bounce card to sculpt depth.
Integrating Trends And Internal Resources
Video already accounts for 82% of internet traffic. Marketers using AI report 23% cost savings and 54% faster workflows.
Learn more about video trends on recorder.easeus.com
Check out our guide on creating faceless videos for detailed workflows.
A consistent setup and the right tools make faceless videos feel personal.
Nonprofit Animated Character Example
A nonprofit added a simple mascot animation to compliance training and saw engagement jump 25%.
- Sync character movements to narration beats for clarity.
- Use brand colors in backgrounds and characters to reinforce identity.
Advanced Audio Tips
Choose WAV for pristine quality or MP3 for lighter files and faster uploads.
Normalize levels so viewers aren’t constantly adjusting their volume.
- Pop Filter: Position it about 2 inches from the mic to tame plosives.
- Room Treatment: Hang moving blankets or foam panels to cut echo.
Final Setup Checklist
- Framing at Eye Level With Stable Camera
- Balanced Key and Fill Lighting
- Tested Audio Levels and Noise Checks
- Script Segments Synced to Visuals or Narration
Checking these off means fewer reshoots and a smoother edit.
Lighting Upgrades For Impact
A backlight separates you from the background and adds dimension.
- Rim Light: Place a small LED behind you to outline shoulders and hair.
Experiment with colored gels or diffusers to set the right mood.
Wrapping Up Production
High production values signal that you respect your audience’s time.
A reliable setup, paired with clear checklists, ensures each training video looks and sounds polished.
Nail these fundamentals and you’ll build a workflow that scales with every new project.
Editing And Captioning For Clarity
Once your footage is in the editor, you’re not just cutting clips—you’re crafting a smooth learning journey. A well-organized timeline and a handful of clever shortcuts can shave off 30% of your editing time.
Editing Workflow Basics
- Lay out separate lanes for narration, music, b-roll and on-screen graphics.
- Rely on JKL for scrubbing, Cmd/Ctrl+K to slice, and Alt+drag to slip clips.
- Save a project preset with your brand’s LUTs and favorite transitions.
With tracks grouped by topic or scene, swapping segments becomes painless. Use markers to highlight teaching moments and razor out any dead space—your pacing will thank you.
Editing Shortcuts And Presets
- Customize your keyboard layout so your most-used tools are always under your fingertips.
- Assign hotkeys to transitions and effects you repeat often.
- Build LUT collections for daylight, tungsten and mixed lighting scenarios.
- Automate those tiny, repetitive tasks with macros or built-in scripts.
These tweaks keep you out of menus and focused on the story.
Advanced Editing Tips
Mixing and color both play a huge role in clarity. Start by normalizing dialogue to around −6 dB, then tuck your background track at −18 dB. From there:
- Enable audio ducking to dip music automatically when narration kicks in.
- Compress voice tracks gently to smooth out spikes.
- Layer in ambient sound to bridge silent cuts and retain immersion.
When it comes to color, match key scenes so cuts feel natural. Simple dissolves or whip transitions help concepts flow without jarring the viewer. A touch of motion blur on fast cuts—plus understated text animations—keeps the focus where it belongs: on your voiceover.
Captioning Workflow Basics
- Export a transcript straight from your editing suite or via a captioning service.
- Tweak timecodes so every subtitle hits within 0.1 seconds of speech.
- Clean out filler words, tighten up punctuation and remove unnecessary speaker labels.
- Save your subtitles in SRT or VTT format, depending on your hosting platform.
Adding captions typically lifts watch time by 12%, especially for mobile and non-native speakers.
This interface shows color-coded segments and error flags, making it easy to spot mismatches.
You might be interested in 7 Ways Captions Improve Video SEO
Captioning Best Practices
Accurate subtitles keep learners engaged and protect your credibility. A typo in a technical term can derail a viewer’s trust in seconds. To stay on point:
| Best Practice | Benefit |
|---|---|
| Double-space between lines | Improves readability when scanning subtitles |
| Use sentence case | Feels more conversational than all-caps |
| Limit two lines per panel | Keeps text concise and avoids on-screen clutter |
- Choose a sans-serif font like Arial or Roboto for razor-sharp letters.
- Check WCAG contrast ratios so captions are legible for everyone.
- Preview captions in context—on-screen graphics or text overlays often require special timing.
Maintaining a captioning template ensures your entire video series looks and feels unified. Give each reader a brief pause between screens to avoid subtitle “racing.”
Key Takeaways
Key Takeaways
- Organize your timeline with dedicated tracks for audio, video and graphics.
- Use audio ducking and compression to keep narration crystal-clear.
- Aim for 99% caption accuracy to accommodate diverse learners.
- Embed subtitles on every platform to enhance accessibility and SEO.
When you blend polished edits with precise captions, your training videos become far easier to follow—and far more professional. Implement these tactics, and your “how to make training videos” guide will really stand out.
Distributing Videos And Tracking Success

Once you’ve recorded and polished your training video, the platform you choose determines what you can track—and how far your content travels. An enterprise LMS gives you deep insights into individual progress, while YouTube or Vimeo can introduce your lessons to a wider audience. Private channels, on the other hand, let you craft a fully branded experience with tight audience control.
- LMS hosts securely and delivers granular user data.
- YouTube and Vimeo amplify discoverability via search and social shares.
- Private channels support custom interfaces and strict access rules.
Choosing Platforms That Match Goals
If issuing certificates or monitoring progress matters most, an LMS is your best bet. Need comments, social buzz, and SEO? Public players cover that. Here’s a quick look:
| Option | Pros | Cons |
|---|---|---|
| LMS | Detailed user data and quiz embedding | License costs and setup time |
| Public Channel | Viral potential and easy embedding | Limited learner control |
Fine-tune your titles with clear keywords—think “how to make training videos”—and write descriptions that pack a punch in under 150 words. A timestamped outline plus links to quizzes or resources keeps learners engaged. Don’t forget tags: they’re the signposts algorithms use to guide viewers to your content.
Aim for an 80% viewer finish rate to measure effective engagement.
Embedding Interactive Elements
Data shows that quizzing learners mid-video turns passive watching into active learning. Drop a multiple-choice question at the end of each chapter or key section, then:
- Use YouTube cards or LMS plugins for quiz delivery.
- Auto-grade answers and send results to your analytics dashboard.
- Provide instant hints on wrong answers to reinforce concepts.
In our pilot, this tactic lifted completion rates by over 20%. Adding chapters and tweaking thumbnail designs pushed engagement up by 35%, guiding viewers straight to the moments that matter.
Distributing With A Roadmap
A distribution roadmap spells out where and when you publish, plus follow-up actions to keep learners on track. Start with a soft launch to a small control group, then roll out more broadly:
- Publish in your LMS and open enrollment for a select cohort.
- Release on YouTube with SEO-optimized settings.
- Embed quizzes and surveys two days post-launch to gather fresh feedback.
- Send reminder emails to anyone who hasn’t completed the module.
This cycle helps you spot drop-offs early and re-engage learners before interest wanes.
Setting Up Your Analytics Dashboard
Your dashboard should track views, average watch time, quiz results and drop-off points side by side. Below is a snapshot of our go-to layout:
This view highlights:
- View Count measures initial reach and interest.
- Average Watch Time shows how deeply viewers engage.
- Completion Rate reveals if your pacing and content resonate.
- Quiz Scores surface knowledge gaps and strengths.
- Drop-Off Points pinpoint the exact moments viewers bail.
Push your finish rate toward 80% across all modules, and don’t skip regular check-ins—nothing replaces the nuance of learner feedback.
Refine thumbnails every quarter to boost clicks and engagement.
Measuring ROI And Learner Progress
Calculating ROI is simpler than you think: subtract total cost from value delivered, then divide by cost. Aim for figures north of 100% to keep stakeholders on board. Track progress by:
- Reviewing dashboard trends and anomalies monthly.
- Swapping thumbnail designs to A/B test visual hooks.
- Surveying learners quarterly to capture satisfaction and suggestions.
Pairing data with direct feedback fosters a learning culture that continually improves. This feedback loop drives actionable tweaks and ensures your training videos deliver real business results.
Tracking and refining distribution flows ensures your training videos deliver real business value.
With a clear plan and data scaffold in place, you’ll watch both engagement and impact climb. Tools like ShortsNinja handle multi-channel publishing, timezone adjustments, and series automation so you can focus on strategy, not scheduling.
- Built-in voiceovers in over 50 languages expand your global reach.
- AI-driven thumbnails and banners update automatically based on A/B results.
Personalize descriptions with teasers for upcoming sessions or live Q&A events to keep learners coming back.
Optimizing For Search And Shareability
SEO isn’t an afterthought—it’s the engine that drives organic discovery. Kick off titles with actionable phrases and target keywords, for example, How to Make Training Videos Today. Keep descriptions tight, under 150 words, spotlight benefits with bullet lists, and include timestamps to guide clicks.
- Use 5 to 8 relevant tags, mixing broad and niche phrases.
- Monitor tag performance quarterly to stay aligned with search trends.
Well-optimized metadata can boost views by 50% on public platforms. Sprinkle social buttons into your LMS or video overlays, and close with a simple call to action—this can lift shares by 15%. Finally, automate reminders for anyone who hasn’t finished key modules. Consistent tracking and updates based on real-world feedback will keep your learner outcomes climbing.
Next Steps To Master Training Video Creation
You’ve moved from brainstorming to a polished draft—now it’s time to launch with confidence. This concise checklist will help you catch any slips before your next video goes live and keep learners glued to the screen.
Use this pre-launch guide to smooth out the final kinks:
- Preflight Review: Double-check your script, visuals, captions, and metadata.
- Template Creation: Build reusable storyboards and segment-timing outlines.
- Feedback Setup: Schedule peer reviews and learner surveys within 48 hours of launch.
- Analytics Configuration: Hook up dashboards to monitor completion rate, average watch time, and key drop-off points.
Next, draft templates that echo your brand’s style. Consistent visuals and tone across modules build trust and make production faster.
Scaling Your Video Library
When your library expands, let data guide you to the right topics. For instance, a compliance series that followed learner analytics saw error rates drop by 18%.
Automate tags for themes and skills so you spot gaps in demand at a glance. Then embed quick reflection prompts or 30-second polls at the end of each module—real-time feedback fuels rapid improvements.
“A feedback loop increased view-through rates by 22% in one pilot program.”
As you collect insights, batch updates in small bursts rather than overhauling everything at once.
Experiment With New Formats
Static videos are a solid foundation, but mixing in interactive formats keeps things fresh. A micro-workshop pilot, for example, bumped engagement by 25%.
Try:
- Branching Scenarios: Let learners choose their own path.
- Live Workshops: Host real-time Q&A and group exercises.
- Interactive Transcripts: Clickable text that jumps to key moments.
| Format | Benefit | Use Case |
|---|---|---|
| Live Workshop | Real-time Q&A and group energy | Onboarding cohorts |
| Interactive Branching | Personalized learning journeys | Compliance training |
| Micro-webinar Series | Bite-sized lessons with clear takeaways | Skill refreshers |
Keep an eye on ROI and learner satisfaction as you roll out new formats—measure frequently so your next round of tweaks is smart and fast.
Integrate these next steps into your workflow using ShortsNinja to automate scheduling and multi-channel publishing. Your training videos will educate, engage, and deliver measurable results.
FAQ
What gear do you really need to launch training videos from home? Think 1080p clarity, reliable audio, and flattering light.
A basic kit includes:
- A camera capable of 1080p capture for sharp, budget-friendly footage
- A USB or lapel mic to cut background noise and focus on your voice
- Softbox or ring lights for even, natural-looking illumination
- A sturdy tripod or adjustable stand to lock in your framing
Curious about ideal runtimes? Nail your timing for better retention. Quick tips work wonders in under five minutes, while in-depth tutorials shine at 20–30 minutes.
Video Length Guidelines
| Format | Ideal Duration | Best Use Case |
|---|---|---|
| Microlearning | Under 5 minutes | Quick skills or tips |
| Full-Length | 20–30 minutes | Deep dives and demos |
To gauge real impact, keep an eye on:
- Completion Rate: Percentage of viewers who finish your video
- Quiz Scores: Reveal knowledge gaps and reinforce learning
- Learner Feedback: Surface clarity issues and spark improvements
High completion rates often follow focused content and steady pacing.
Presenter on camera or faceless style? A live host builds rapport, but a faceless approach scales faster and trims production stress.
Presenter Vs Faceless
| Option | Pros | Cons |
|---|---|---|
| Presenter | Strong connection and expression | More setup time and retakes |
| Faceless | Consistent branding and low stress | Less personal engagement |
Pick what suits your audience, budget, and timeline. Then dive into analytics within 48 hours to catch early drop-offs. And don’t forget to test thumbnails to boost clicks.
Ready to automate your training video workflow with AI-driven faceless content? Try ShortsNinja today and save time across TikTok, YouTube, and Instagram. Get started here